ClevGuard Support: Monitor Devices with Others' Permission.
Before We Start
A screenshot is an image that consists of all that is there on your screen.
Screenshots can be easily captured on a desktop computer by using shortcut keys or some third-party tools.
We will show you how to screenshot on computer including both Windows PC and Mac with quick steps.

How to Screenshot on Computer
Part 1: How to Monitor and Screenshot Windows Computer Remotely Without Knowing
How to Monitor and Screenshot Windows Computer Remotely Without Knowing
As we have mentioned in the beginning, you can also screenshot on Windows by using a third-party tool. In this way, you can monitor and screenshot computer remotely without them knowing, thus check what your employee or children are doing on the computer.
As for the third-party tool for taking screenshots on a computer, we have just the right recommendation for you! MoniVisor for Win can do a screenshot on a desktop computer remotely and secretly. It is used and endorsed by all professionals and experts.
How does it work: MoniVisor for Win is capable of taking automatic screenshots of the user's computer screen. This is done in intervals that you specify according to your needs. If you want, you can take automatic screenshots every five minutes with breaks of fifteen seconds.
How to Take A Screenshot on Windows
Here are all the steps you need to follow to utilize MoniVisor for screenshot on Windows features:
Step 1: Create an Account
First, you can click the button below to choose a plan suitable and get a create a valid account for the software from your email.This is essential to unlock and activate all the features of MoniVisor that you need.
Step 2: Download and Install The Software
Next, you need to download and install MoniVisor for Win on the computer that you want to take a screenshot. For this, you'll need physical access to the target computer.
After downloading, you'll be given detailed instructions on how to complete the required configurations on the user's computer.

You're advised to use the incognito browser to download it or to clear the computer's browser history afterward. This is to ensure that you don't leave any traces behind that may tip off the computer's user.
Step 3: Login Your Account & Start Monitoring
Then you can login your account and have access to the web dashboard. Now, you can start monitoring from the convenience of your own dashboard.
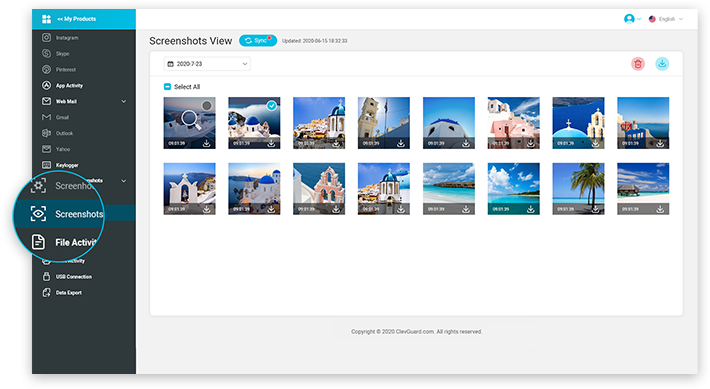
When you want to examine the screenshots from the target computer, just click on the 'Capture Screenshots' option and get started with the feature. Please make sure that the computer is switched on at all times.
You can click Start button to take screenshots from the computer. Then screenshots will be taken every 15 seconds for 5 minutes. After that, you can easily check all the captured screenshots on the intended computer.
Why Choose MoniVisor for Win to Take A Screenshot On Windows Computer?
Apart from MoniVisor for Win's trustworthy reputation, there are incredible benefits for using it. The ones catered towards its screenshot feature are as follows:
The dashboard is easy to access. You can check the screenshots at any time or place you want.
All of the captured screenshots can be downloaded and saved for further checking.
MoniVisor for Win runs in stealth mode. The computer you want to monitor won't have the slightest clue of the task being undertaken.
MoniVisor for Win can do more than just take screenshots on a desktop computer. As a comprehensive computer monitoring tool, it offers more computer monitoring features for you - monitors social media chats, tracks internet history, reads emails and records keystrokes, etc. You can check out more info on its Free Demo.
How to Screenshot on Windows 10 Computer
There are a few ways to do screenshots on desktop computer. We've explained each method in detail below.
1. Screenshot Computer for Entire Screen
How do I take a screenshot on my computer for the entire screen? There are two methods to take a screenshot of the entire screen, and they are as follows:
Method 1. Press the Windows key + PrtScn
Click on the Windows Key + Print Screen key.
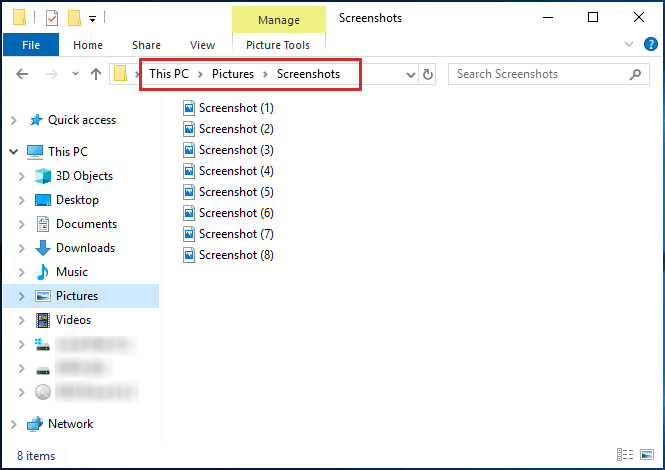
Then, press Windows Key + E to go to the Pictures Library present on your computer.
From here, you can click on Pictures and open the Screenshots folder. Your screenshot will be saved in this folder.
Method 2. Click on the Print Screen key
Simply click on the Print Screen key.
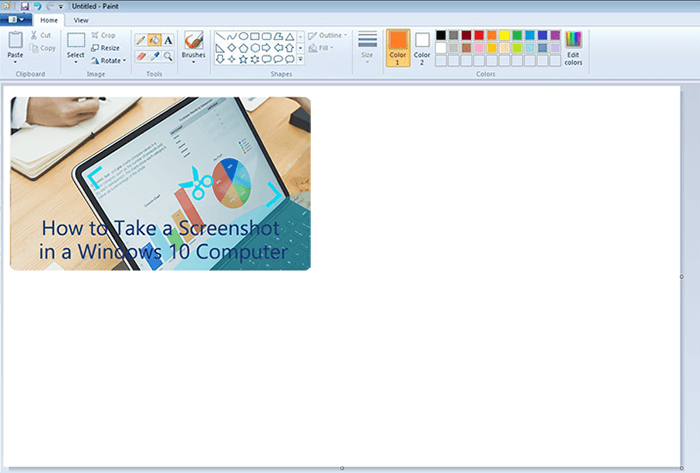
Then open Microsoft Paint.
You'll need to click on Ctrl + V to paste the screenshot in Paint.
Now you can simply press Ctrl + S or go to File > Save as to save the screenshot wherever you want to.
2. How to Screenshot on Computer for A Part of The Screen
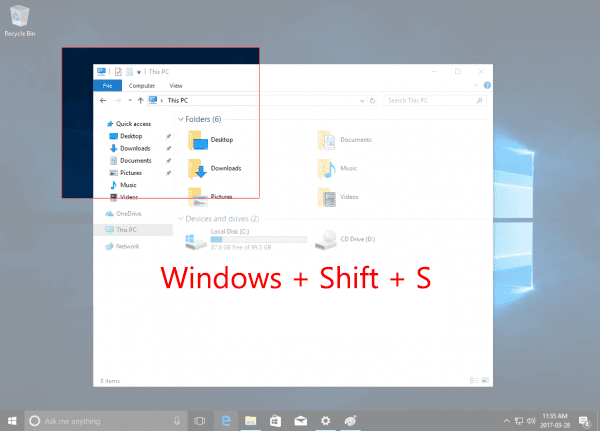
Click on Windows + Shift + S key first. By doing this, you'll alter your mouse cursor, and your screen will appear grey.
Then you need to click on your cursor and drag it along the screen to select the part of the screen you need to take a screenshot of.
A screenshot of the selected part of the screen will be captured and copied onto your clipboard. You can paste this in any place you want to.
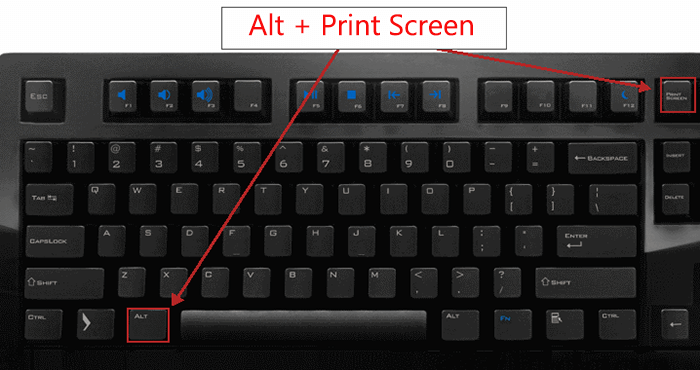
3. How to Screenshot Computer of The Current Window
First of all, select the window you want to capture a screenshot of.
Now, click on the Alt + Print Screen key. Then the screenshot you have just taken will be saved to your clipboard.
Then, click Ctrl + V after opening Microsoft Paint. Then the captured screenshot will be pasted onto Microsoft Paint Paint, and you can download and save it anywhere you want to from there.
4. How to Screenshot on Computer Windows 10 via the Game Bar
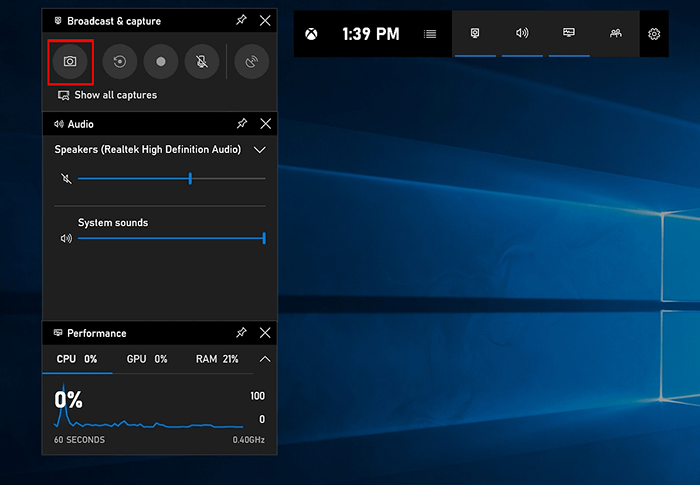
If you want to capture a screenshot through the Game Bar on a Windows 10 PC, the first thing you need to do is click on Windows key + G.
Now, click on the Camera button present to capture a screenshot.
When you have the Game Bar opened, click the camera icon to take a screenshot. Or you can also do that by clicking Windows + Alt + Print Screen.
5. How to Screenshot at Computer Windows 10 with Snipping Tool
The Snipping Tool is a built-in screenshot utility in Windows computers. You can use it to capture a screenshot on Windows 10 computer. It is worth mentioning that this tool can be used to capture a screenshot of a chosen rectangular area, a specific window, or the entire screen on a Windows PC.
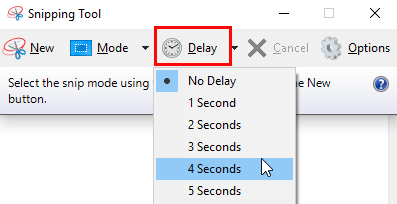
Open the Snipping Tool by typing "snipping" in the Windows search box, and then choose the Delay option.
Then you'll get a drop-down menu, and from here, you can choose the number of seconds you'd want to wait before your screenshot is taken.
If you select the arrow next to 'New,' you can select the kind of snip you want. The four types of snips available for you to select from are free-form, rectangular, window, and full-screen. When the seconds that you chose to wait have gone by, the screen will proceed to freeze and fade out so you can make your snip.
How to Screenshot on Mac Computer
If you're also thinking about how do I take a screenshot on my computer Mac, here are some available methods to do that.
1. How to Screenshot Computer of Entire Screen
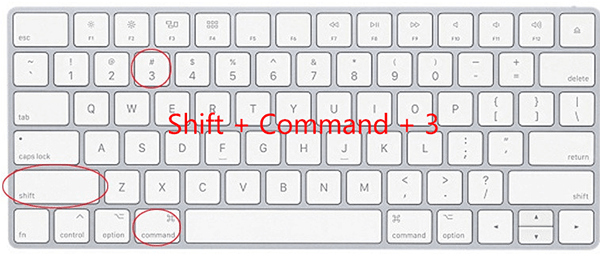
To capture a screenshot of the entire screen on a Mac, you can use the shortcut Shift + Command + 3. Then the screenshot will automatically save as a PNG file on the desktop.
2. How to Screenshot Computer of A Part of The Screen
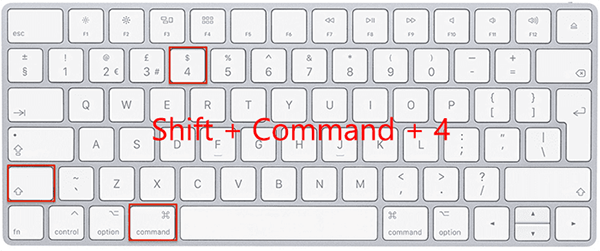
Press Shift + Command + 4, then your pointer will change to a crosshair.
Drag the crosshair to select the area of the screen you want to capture.
Then release your mouse to capture the screenshot. The screenshot will be saved as a PNG image on your desktop.
3. How to Screenshot Computer of The Current Window
Open the window or menu that you want to capture.
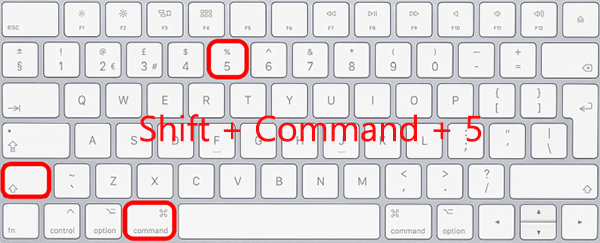
Press Shift + Command + 5, then your pointer will change to a camera icon.
Click the window or menu to capture it by moving your cursor.
Then release your mouse to capture the screenshot. The screenshot will be saved as a PNG image on your desktop.
4. How Do I Screenshot Mac Computer of Touch Bar
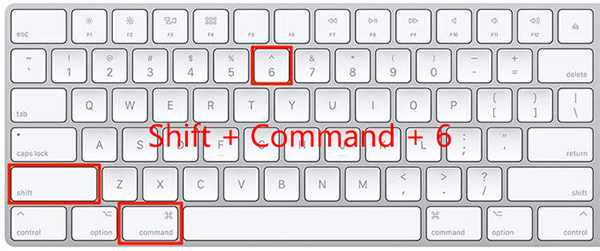
If your Mac comes with a Touch Bar, and you want to share something on your Touch Bar, then you can take a screenshot on it by pressing Shift + Command + 6. The screenshot will be saved as a PNG file on your desktop.
5. How to take screenshots on Mac with Screenshot Tool?
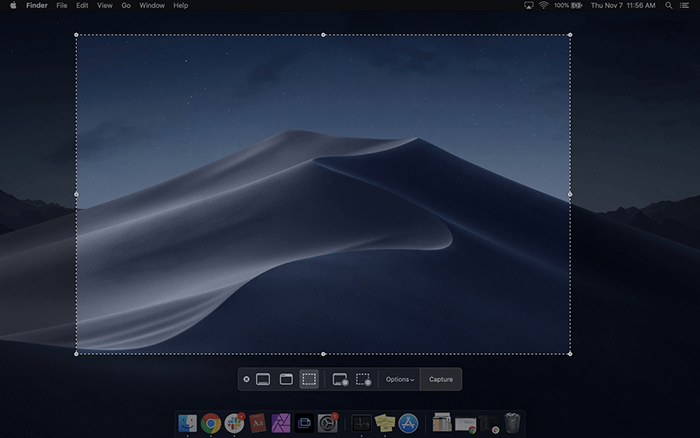
macOS Mojave and the newer version come with a Screenshot app so you can take a screenshot as you want on your Mac.
To open the screenshot toolbar on your Mac, just go to Launchpad > Other > Screenshot, or use the shortcut Shift + Command + 5.
Then choose the option you want — Entire Screen, Selected Window, or Selected Portion. Then the screenshot will be taken as soon as you have selected the option you want. The screenshot taken will be saved in the bottom-right corner of your screen.
Final Words
After reading this detailed guide, you may discover several methods for taking screenshots on desktop PCs. It discusses strategies that are appropriate for both Windows and Mac operating systems. Overall, the way I recommend the most is to use a professional computer screenshot tool such as MoniVisor. It is user-friendly, allowing anyone to effortlessly capture and save screenshots for their requirements. Now, give it a shot, it won't let you down!


