ClevGuard Support: Monitor Devices with Others' Permission.
Find My Live Location is a popular feature that allows users to share their real-time location with friends and family. This feature is available on various social media and messaging platforms, including Facebook Messenger, WhatsApp, and Snapchat. By sharing your live location, you can keep your loved ones informed about your whereabouts and ensure their peace of mind. Additionally, this feature makes it easier to coordinate meetups and navigate to new locations. But what does Live mean on Find My Friends? In this article, we'll explore the meaning of "Live" on Find My Friends and how it can help you stay connected with your friends and family.
Table of Contents
Part 1: What Does Live Mean on Find My Friends?
Part 2: How to Turn on Live on Find My Friends
- Turn on Location Services on Phone
- Enable Share My Location of Find My Live
- Turn On Share My Location on Find My App
Part 3: How to Add Someone to Find My Live Location
Part 4: Can I Fake Location to Prevent Find My Friends Live Tracking for Free
Part 1. What Does Live Mean on Find My Friends?
If you're using the Find My Friends app on an iPhone or iPad, you may have noticed the "Live" label next to some of your friends' names. But what does live on find my friends mean? Essentially, it means that you're viewing that person's real-time location. When a friend shares their location with you and has the "Share My Location" feature turned on, you can see their location on a map. However, if their location is marked as "Live," it means that you're seeing their location in real-time, rather than just their last known location.
Part 2. How to Turn on Live on Find My Friends
If you're new to the app, you might be wondering how to turn on this feature. We'll guide you through the steps to turn on "Live" on Find My Friends so that you can stay connected with your friends and family at all times. Whether you're worried about your child's safety or want to make sure your partner arrives safely at their destination, turning on "Live" can provide you with peace of mind. So, let's get started!
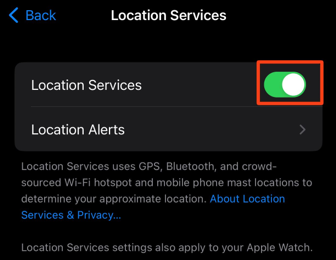
2.1 Turn on Location Services on Phone
Here are the steps to turn on location services on your phone:
For iPhone:
- Open the Settings app.
- Scroll down and tap on Privacy.
- Tap on Location Services.
- Toggle the switch next to Location Services to turn it on.
For Android:
- Open the Settings app.
- Tap on Location.
- Toggle the switch next to Location to turn it on.
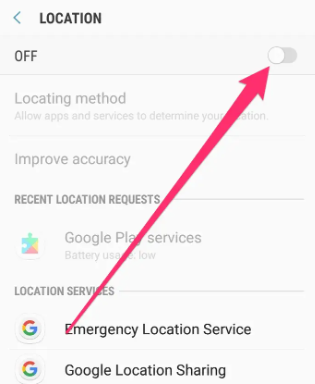
Note: The steps may vary slightly depending on your phone model and operating system version.
It's important to keep in mind that turning on location services can drain your phone's battery faster than usual. If you're not using any location-based apps, you may want to turn off location services to conserve battery life.
2.2 Enable Share My Location of Find My Live
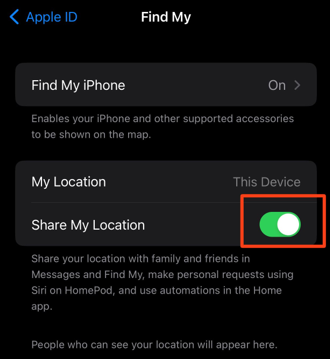
Here are the steps to enable Share My Location on Find My:
For iPhone & iPad:
- Open the Settings app.
- Tap on your Apple ID at the top of the screen.
- Tap on Find My.
- Toggle the switch next to Share My Location to turn it on.
For Mac:
- Open the Find My app.
- Click on the Me tab at the bottom of the screen.
- Toggle the switch next to Share My Location to turn it on.
Note: You'll need to sign in with your Apple ID to use Find My on all devices. Also, make sure that your device has an active internet connection and location services are turned on for Find My to work properly.
2.3 Turn On Share My Location on Find My App
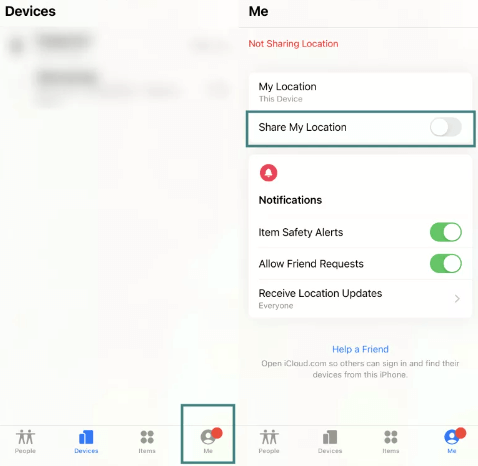
You can also directly enable Share My Location from Find My app:
For iPhone & iPad:
- Open the Find My App. Tap on the Me tab at the bottom of the screen.
- Tap on Share My Location. Toggle the switch next to Share My Location to turn it on.
- Choose how long you want to share your location for. You can choose to share it indefinitely or for a limited time.
- Select the people you want to share your location with by tapping on Add and selecting the contact from your list.
For Mac:
- Open the Find My app. Click on the Me tab in the sidebar.
- Click on Share My Location. Turn on Share My Location option.
- Choose time limit you want to share your live location with friends or families.
Part 3. How to Add Someone to Find My Live Location
Below are the steps to add someone to Find My Live Location:
- Open the Find My app. Tap on the People tab at the bottom of the screen. Choose the Share My Location button.
- Choose the person you want to share your location with by tapping on Add and selecting the contact from your list.
- Select Share Indefinitely or Share for One Hour to choose how long you want to share your location for.
- Tap on Send to send the invitation to the person.
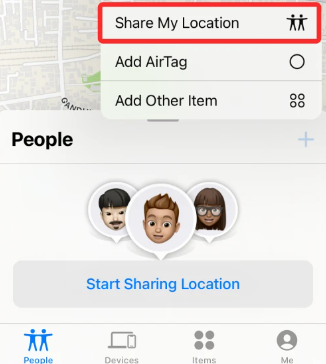
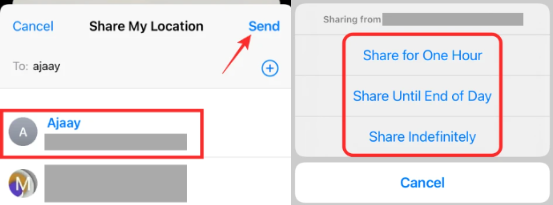
Note: The person you're sharing your location with will need to have an iPhone, iPad, or Mac with Find My app installed and signed in with their Apple ID. They'll also need to accept your invitation to start sharing their location with you.
How to Find Someone's Location on Find My iPhone
Once the person has accepted your invitation, you'll be able to see their live location on the map in Find My app. You can also choose to receive notifications when they arrive or leave a certain location.
- Open the Find My app on your iPhone, iPad, or Mac. Tap on the People tab at the bottom of the screen or sidebar on Mac.
- Choose the person you want to locate from your list of contacts.
- Tap on Notify Me to receive a notification when the person arrives or leaves a certain location.
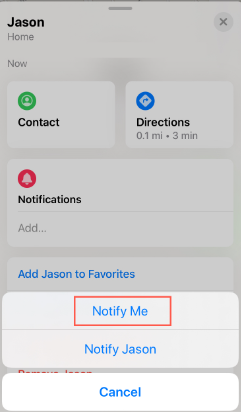
If you're unable to locate the person using Find My app, it's possible that they have turned off their location services or their device is not connected to the internet. In this case, you may need to contact the person directly to find out their location.
Part 4. Can I Fake Location to Prevent Find My Friends Live Tracking for Free
Are you tired of being tracked by your friends and family on Find My app? Do you want to have more privacy and control over your location? If so, you might be interested in ClevGuard Clevgo that allows you to fake your location and prevent Find My Friends live tracking for free. With the free location spoofer, you can enjoy more freedom and privacy while won't be detected and notified.

Features of Life360 Location Changer
Step 1. Install and launch the program on your computer. Enable the disclaimer and click on Get Started.
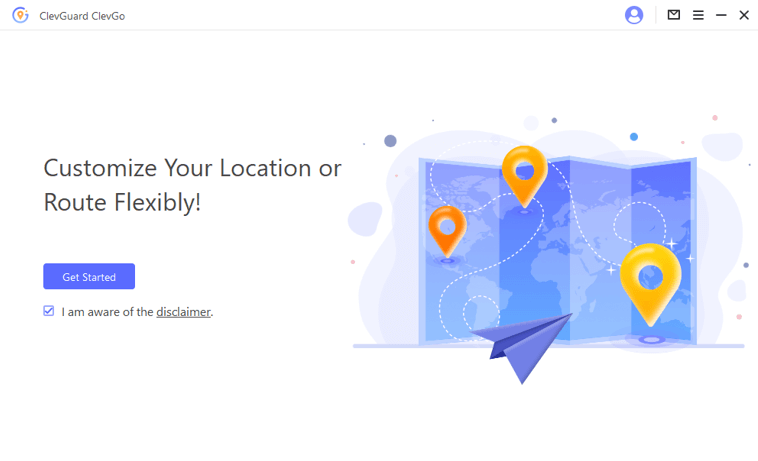
Step 2. Connect your Android or iOS devices to computer. The program will automatically detect your device information.
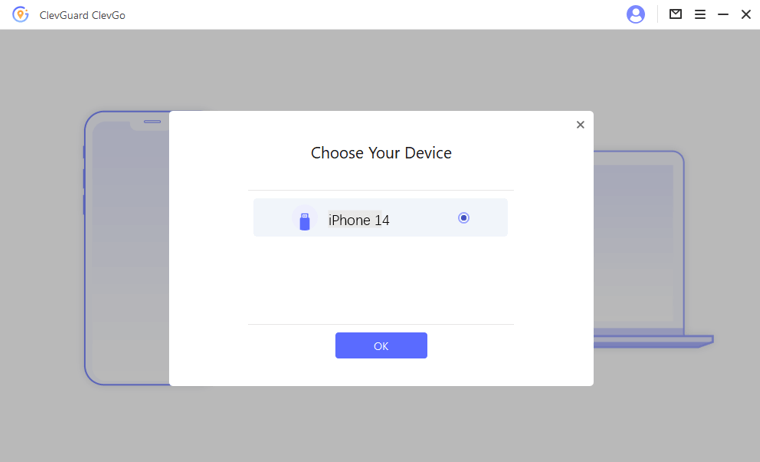
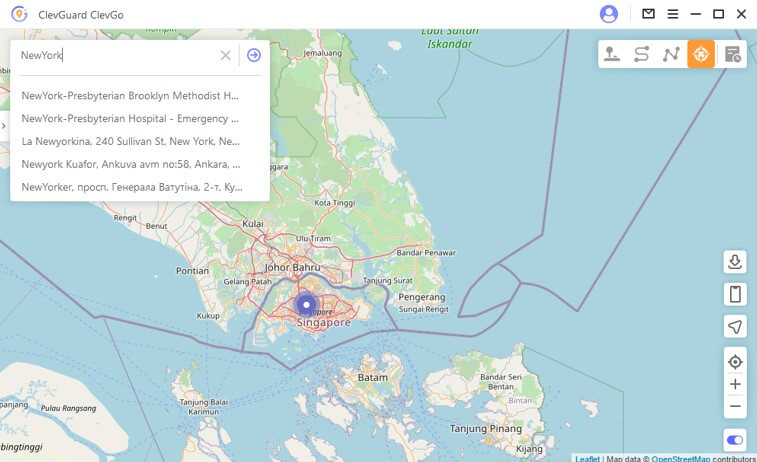
Step 3. Choose Teleport Mode, then you need to enter any location you want to fake your live location.
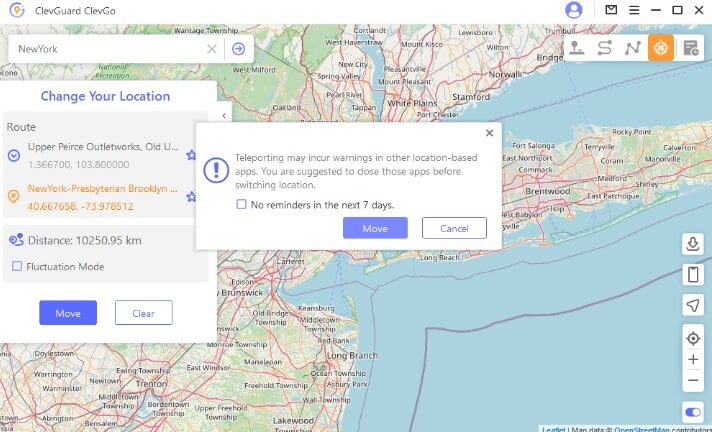
Step 4. Finally click on Move. Your GPS location on phone will be changed, and you can prevent Find My Friends live tracking without turning it off.
Conclusion
In conclusion, Find My Friends is a great app for keeping track of your loved ones' locations. The "Live" feature allows you to see their location updates in real-time, which can be very helpful in certain situations. However, it's important to remember that this feature can also be invasive and may cause privacy concerns. If you want to turn on Live on Find My Friends, it's a simple process that can be done in a few steps. Additionally, if you're looking to prevent live tracking on Find My Friends, using a location changer like ClevGo can be a great solution. With the program, you can fake your location and prevent others from tracking you in real-time. So if you're looking for a free way to protect your privacy on Find My Friends, give ClevGo a free try today!
- Send Fake Location & Live Location on WhatsApp
- How to Change Location on Facebook Dating in 2025
- [ 2025 Update] How to Get a Joystick in Pokemon Go
- [ 2025 Newest] Monster Hunter Now: The Ultimate Guide to Mastering the Game
- 13 Tips to Fix GPS Not Working on Android: 2025 Latest Guide
You may also be interested in:
By Megan Evans
A certified content marketing specialist with great passion for Internet and online safety. She is bent on educating the audience about cyber safety tips and tricks.
Thank you for your feedback!


