How to Use ClevGo?
- Change Location on iOS More>>
- Change Location on Android with PC More>>
- Change Location on Android with Mobile More>>
Change Your Location on Android
Part 1: Connect Your Android Device with PC
1. Get Started
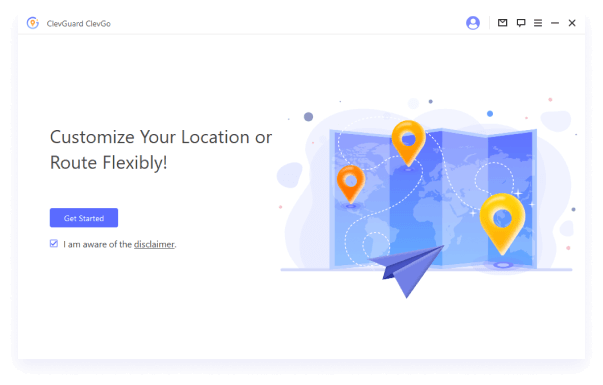
Download and install ClevGo on your computer. Then click "Get Started" to experience it.
2. Connect Your Device
Connect your Android device to the computer with a USB cable.
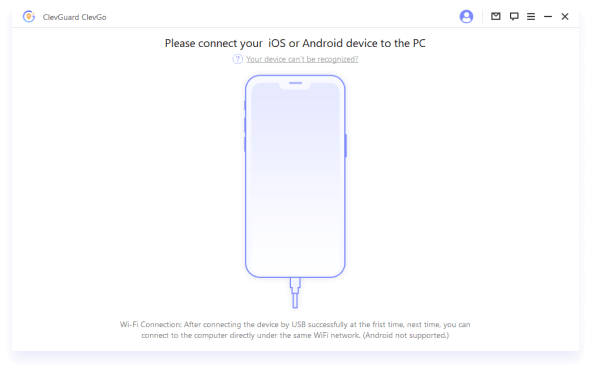
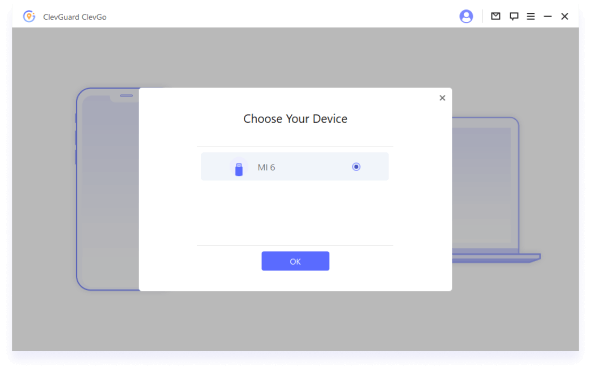
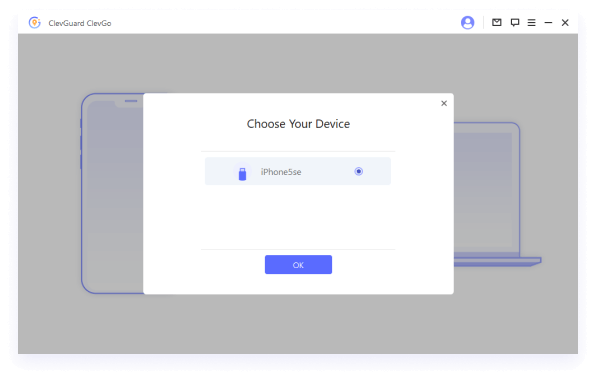
Then a notification "Choose Your Device" will appear. Confirm your device.
3. Select USB Connection Mode
Ensure that the mobile phone's USB connection mode is Media Transfer Protocol (for LG mobile phones, it should be set as Picture Transfer Protocol).
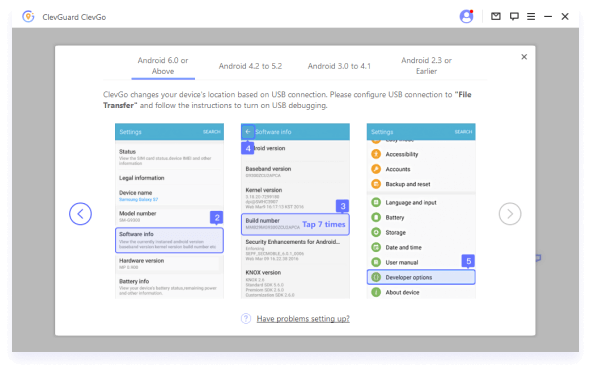
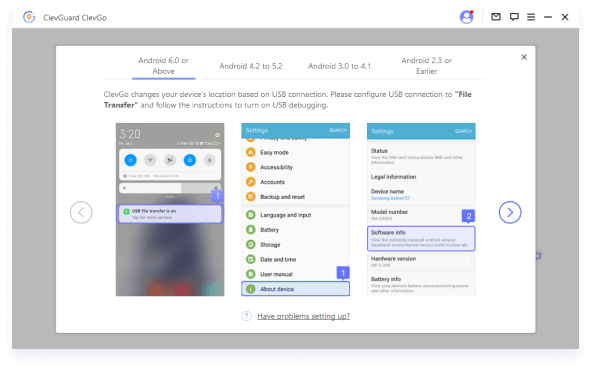
4. Turn on and Allow USB Debugging
Follow the on-screen instructions in the app to turn on USB debugging.
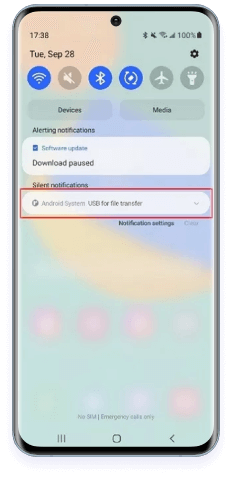
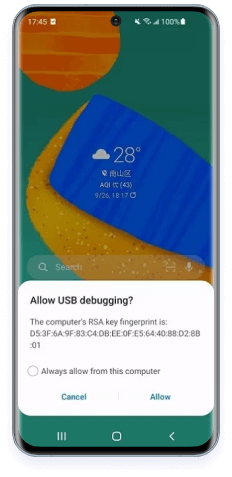
Click "Allow" to allow USB debugging on your mobile phone.
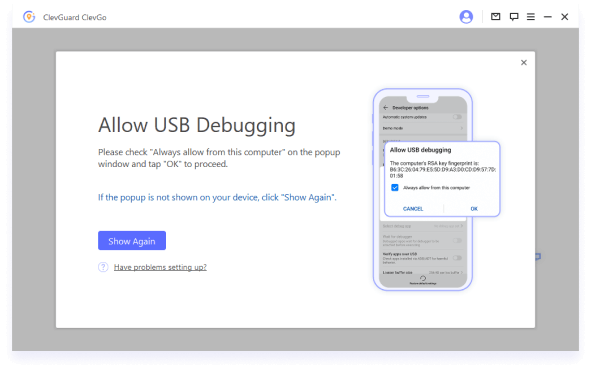
If the notification is not shown on your device, click "Show Again".
5. Select Mocking Mode
When you finish all the settings, you now can choose either Gaming mode or Social mode whatever that suits your needs.
Part 2: Gaming Mode
Gaming mode works for AR Games only.
1. Check the Disclaimer
Check the box to show that you are aware of the disclaimer then enter Gaming mode.
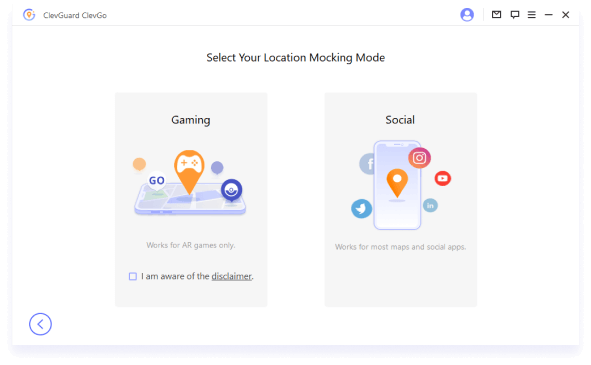
NOTE:
Gaming mode is not always available. When the server is being maintained or updated, there will be a text prompt notifying users of the unavailability. In this case, please wait for a while and check it again later.
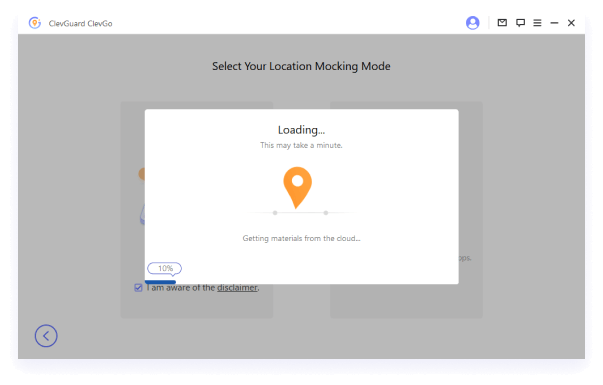
2. Wait for the Map Loading Process
After selecting the Gaming mode, the program will start to load the map. As some mobile phones might require you to confirm and grant permissions, please keep a close watch on your device during the process.
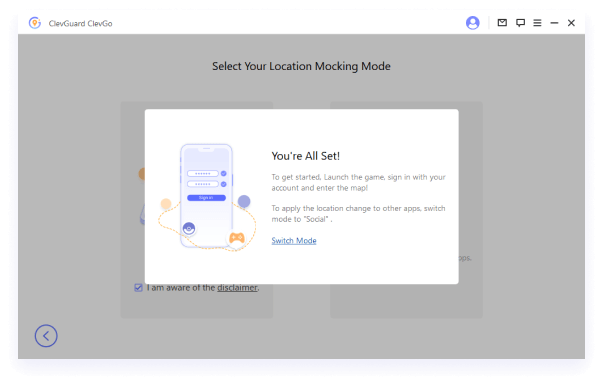
3. All Set!
Once loading is complete, you should see a popup that says "You're All Set!". Login to your game account on your phone if necessary.
Part 3: Social Mode
The Social mode works for most maps and social apps, such as Google Map, Facebook, WhatsApp, etc.
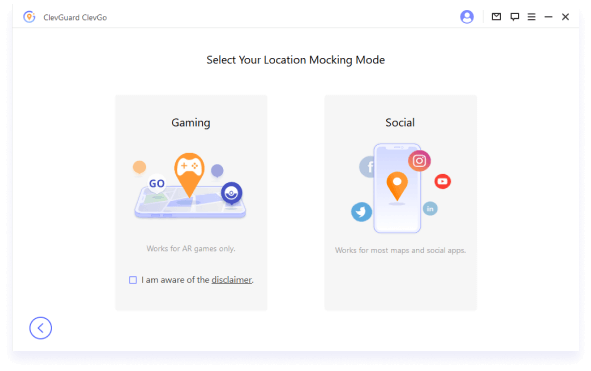
1. Enter Social Mode
Click the Social mode to enter it.
2. Install ClevGo Assistant
Wait a moment and the program will install "ClevGo Assistant" on your mobile phone. (ClevGo Assistant will not appear on the mobile phone under Android 10. It doesn't need to manually start or operate at any time. Just keep on the phone.)
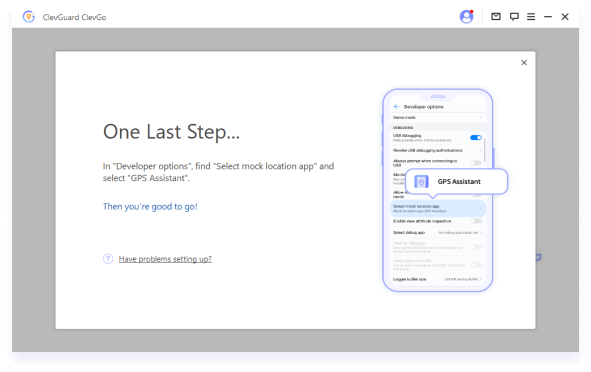
After the installation is completed, find "Select mock location app" in "Developer options", and select "ClevGo Assistant".
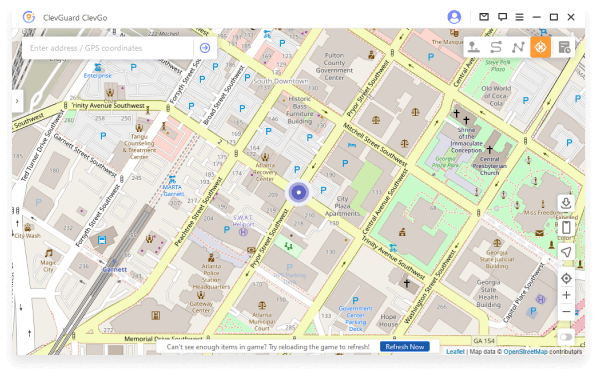
3. All Set!
Now everything is all set. You can change your location or simulate GPS movement.
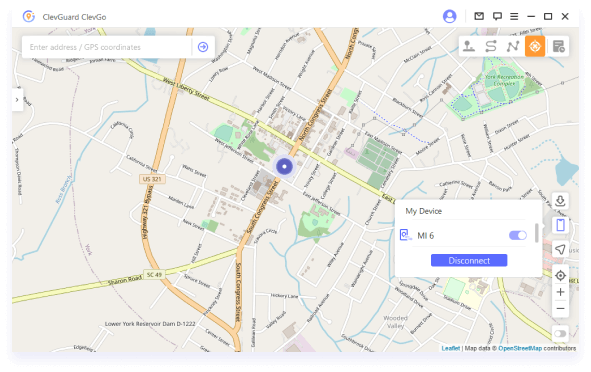
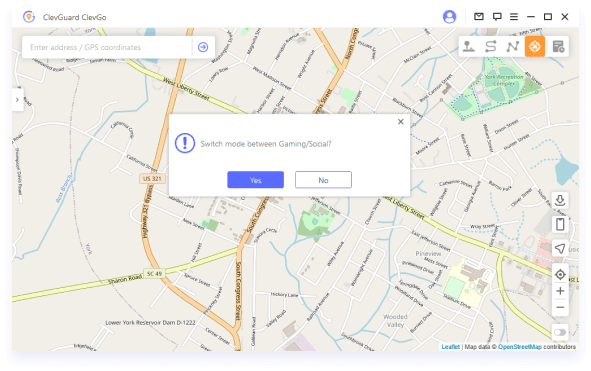
If you want to switch between two modes, click the icon on the left side of your device name and confirm the change.
Then Click “Yes” to confirm the change.
Part 4: Four Modes of ClevGo
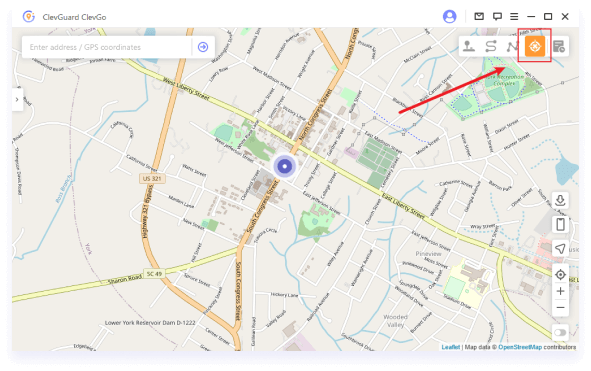
1. Change Your GPS Location Instantly- Teleport Mode
Select " Teleport Mode" in the upper right corner of the dashboard which is the fourth option. Choose a certain location and Click "Move", your location on your device will be changed instantly as well.
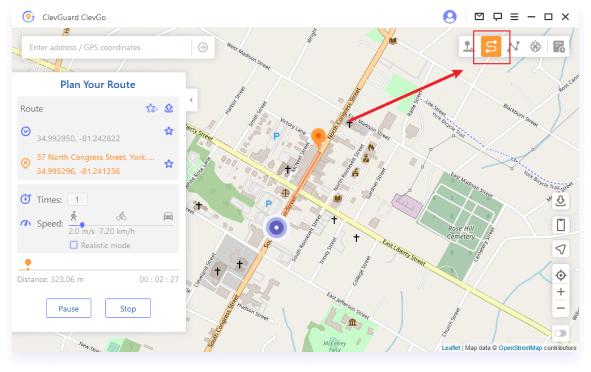
2. Simulate GPS Movement- Two-spot Mode
Select "Joystick Mode" in the upper right corner of the dashboard which is the first option. Click "Move" to change location automatically. You can change location in 360-degree, and move forward or backward by clicking the direction button, arrow keys and WSAD keys to go up, down, left or right.
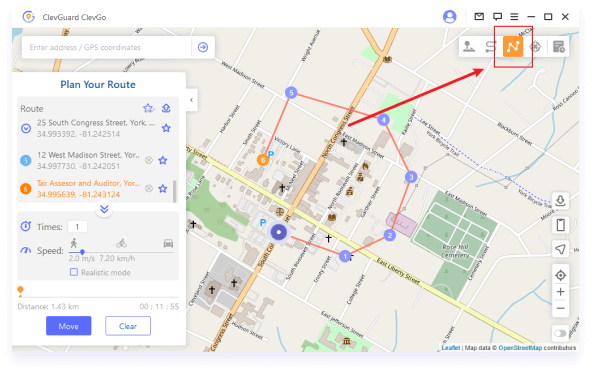
3. Simulate GPS Movement- Multi-spot Mode
Select "Multi-spot Mode" in the upper right corner of the dashboard which is the third option. you can choose many different spots (up to 100) on the map to pass by when simulating the movement. Now you can set up the numbers of moving times and the speed by dragging the speed bar. Once everything is set, click "Move" to start.
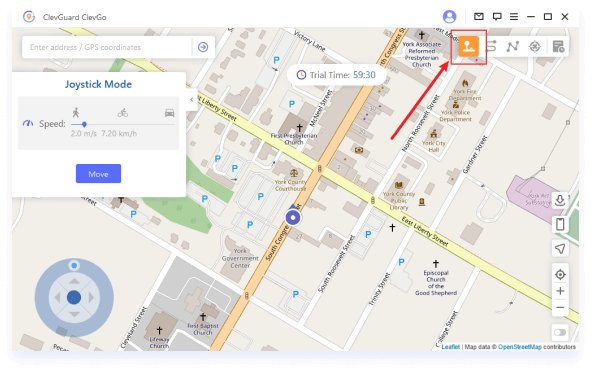
4. Spoof GPS Location with Flexibility - Joystick Mode
Select " Teleport Mode" in the upper right corner of the dashboard which is the fourth option. Choose a certain location and Click "Move", your location on your device will be changed instantly as well.
Part 5: More Exclusive Features of ClevGo
1. Circle Route
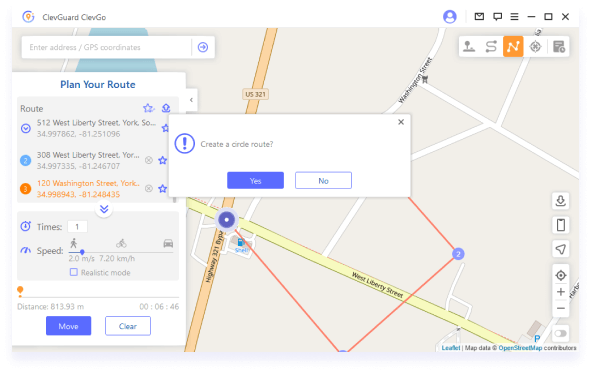
During Multi-spot Mode, if the initial and final location is close to each other, a notification would pop out automatically to ask you if you want to create a circle route. Click "Yes" to connect both spots. Click "No" and everything stays the same.
2. Realistic Mode
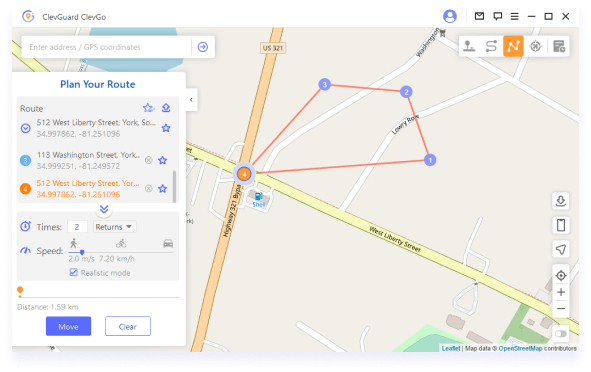
"Realistic Mode" applies to "Two-spot Mode" and "Multi-spot Mode". The moving speed will randomly fluctuate between the upper and lower 30% of the selected speed range. The speed varies every 5 seconds.
3. Returns or Loops
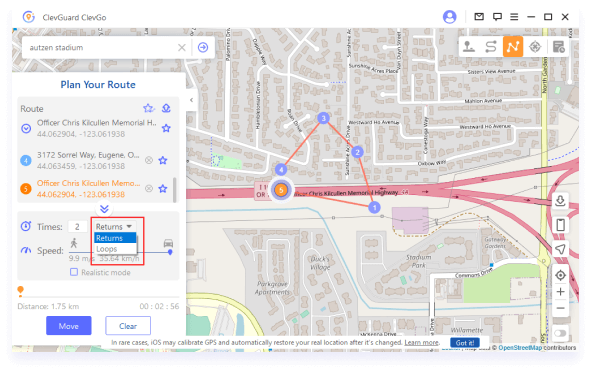
When using the "Two-spot Mode" and "Multi-spot Mode" to simulate movement, If the number of moving times is above 1, the user can choose whether to have the device move back and forth along the route or to move in the loop along the route, as needed.
4. Fluctuation Mode
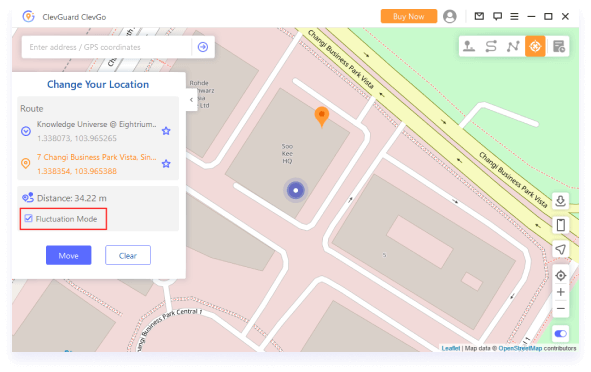
The virtual location will fluctuate back and forth within 5m of the location, which can reduce warnings from other apps about location changes.
5. History Records
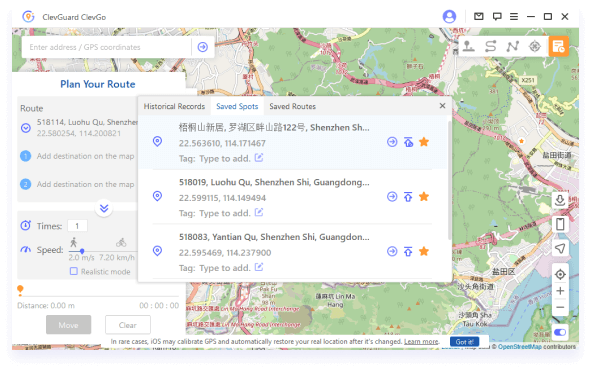
All the addresses and routes you used will be saved in the History Records. You could click on the Star icon to collect the chosen spots.
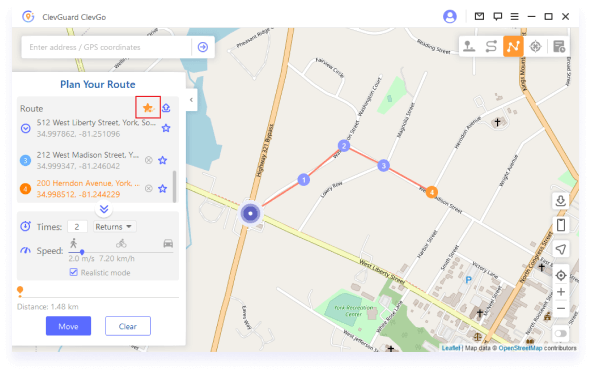
The saved spots or routes will be displayed on your favorite list for further use. Click the Top icon on the left to place your favorites at the top.
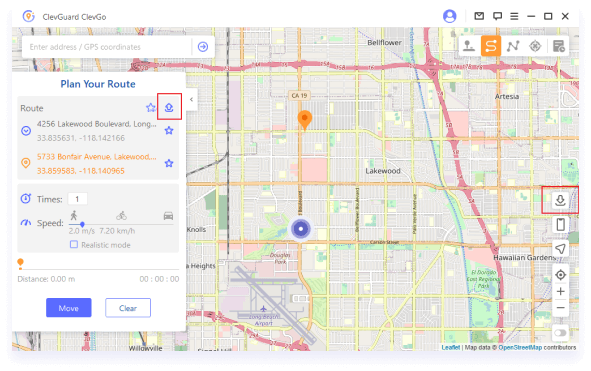
6. Import/Export GPX file
ClevGo can import/export GPX files of single and multiple paths to save your favorite routes now. Click the "Up" icon on the left route panel, and you can export the GPX file. Click the "Down" icon on the right of the dashboard, and you can export the GPX file.
7. Cooldown Timer
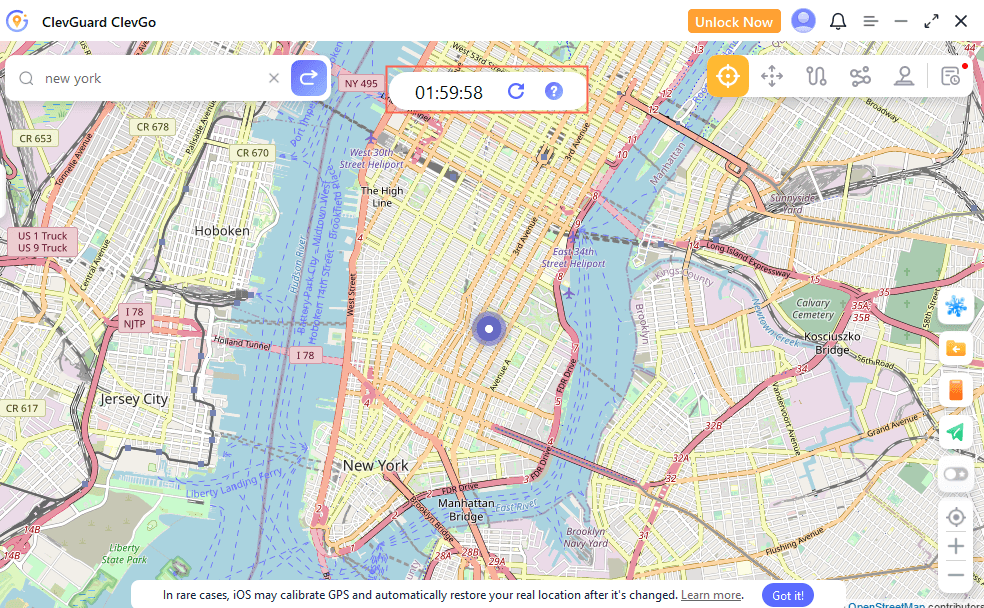
When you use the "Teleport Mode" or "Jump Teleport Mode" to change your location, you will find the the cooling button in the right corner of the product interface.
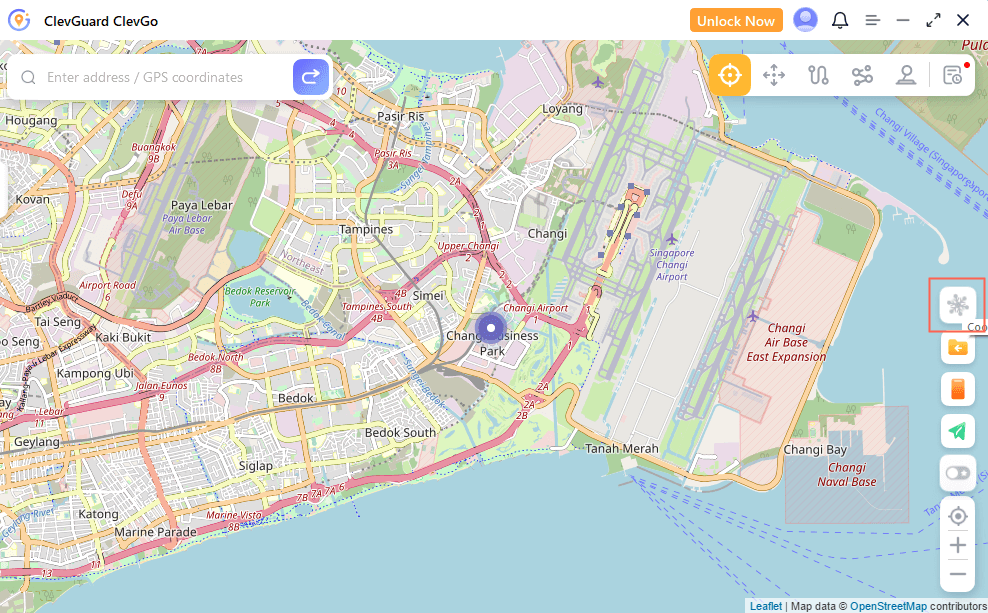
Click on this button, the cooldown timer will appear then. When you choose the desired location and initiate the movement, the timer will calculate the appropriate cooldown time based on the distance.
If you don't want to use coolling timer function, just click the button again to turn it off.
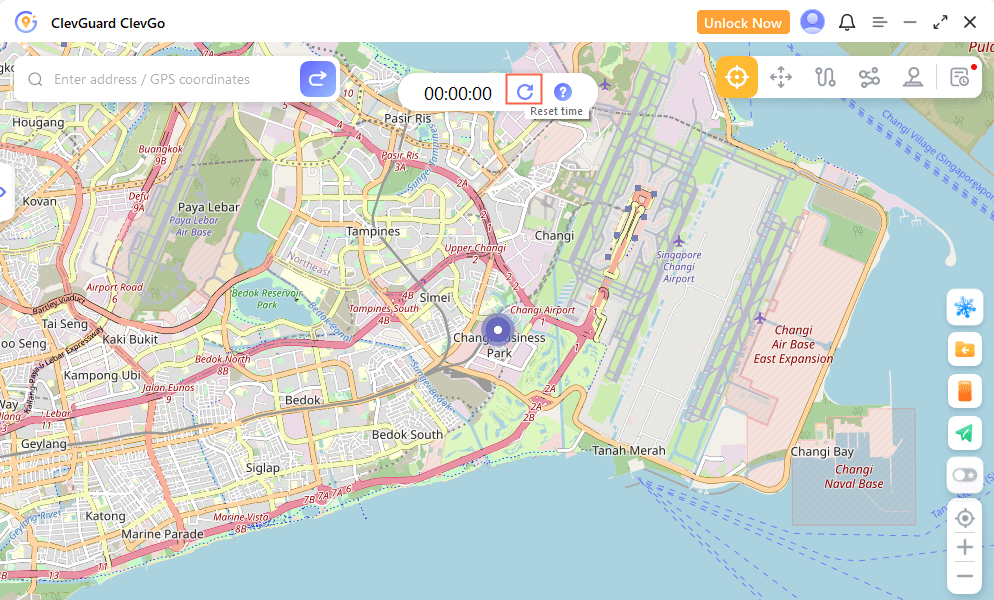
If you want to recalculate the time when you modifying your location, tap "Reset" to refresh it.
How to Use ClevGo?
- Change Location on Android with PC More>>
- Change Location on Android with Mobile More>>
- Change Location on iOS More>>
Change Your Location on iOS
Part 1: Connect Your iOS Device with PC
1. Get Started
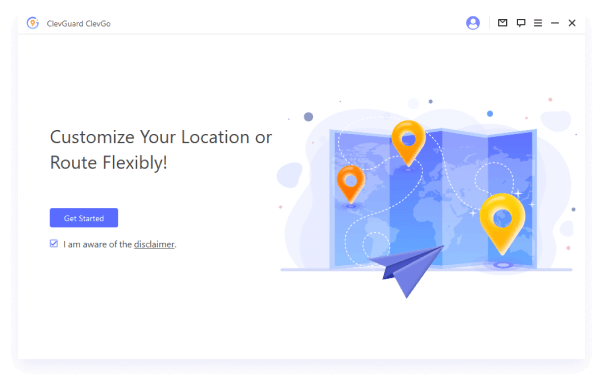
Download and install ClevGo on your computer. Then click "Get Started" to experience it.
2. Connect Your Device
Option 1: Connect your device to the computer through a USB cable. Then, unlock your device, click "Trust" and enter password to finish this process.
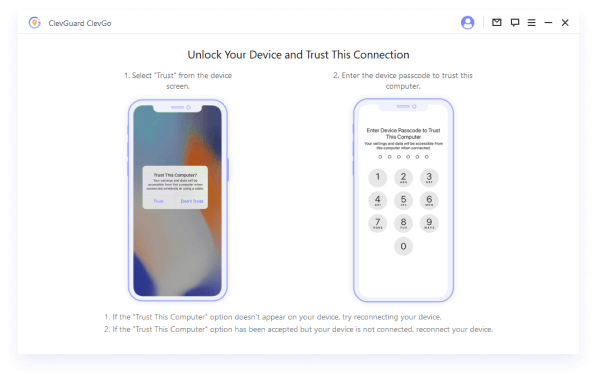
Option 2: After your device has been connected to the computer using a USB cable at least once, then you can also choose to connect your device to the computer via Wi-Fi. Unlock your device and click "Trust" and enter password to finish this process.
NOTE:
For the first time, using a USB cable is required.
The iOS device should share the same Wi-Fi with the computer.
Always keep the device unlocked when connecting to Wi-Fi.
3. Load the Map
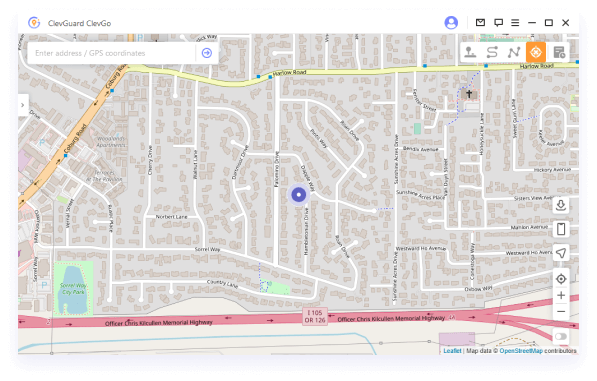
When you are in, you should see the map is loaded. Here you can find your current location.
Part 2: Change Your GPS Location Instantly - Teleport Mode
1. Select "Teleport Mode" and Enter Location
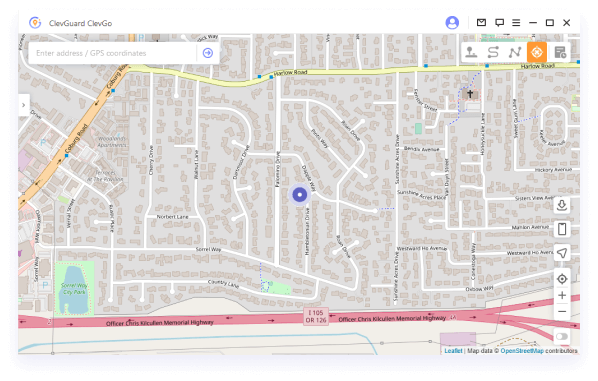
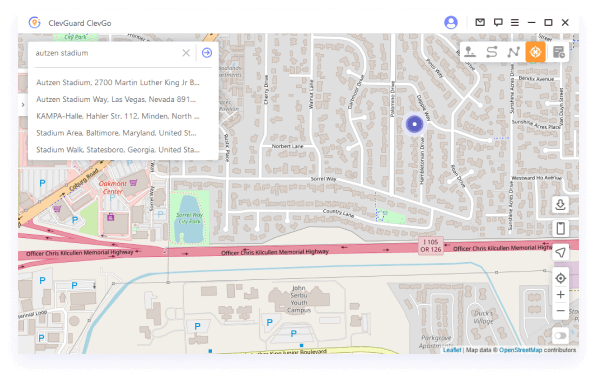
After the map is loaded, select " Teleport Mode" in the upper right corner of the dashboard which is the fourth option. Then you could enter either address or coordinates to search for your desired location.
2. Change Your GPS Location
Once you have chosen the location you want to change into, a pop-up sidebar will show you all the basic information about the location like the exact address, coordinates and distance. With one click on "Move", your location on your device will be changed instantly as well, including the location in your location-based apps.
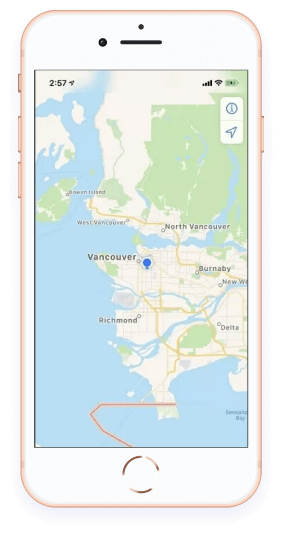
Part 3: Simulate GPS Movement - Two-spot Mode
1. Select "Two-spot Mode"
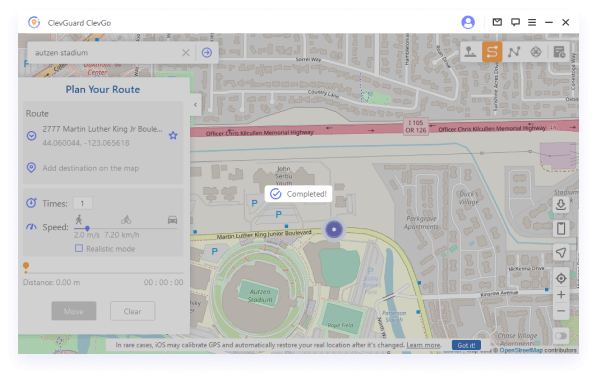
Select "Two-spot Mode" in the upper right corner of the dashboard which is the second option.
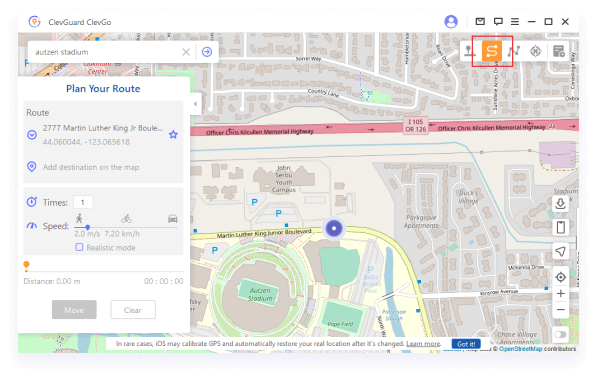
2. Select the Initial and Final Location
Two-spot means the locations where to begin and where to end. You could choose the locations by entering the address or coordinates on the search box or simply pining the locations on the map.
Now you can set up the numbers of moving times, and how it moves on the map to make it look more real. There is also a speed bar for you to drag from walking speed to riding speed.
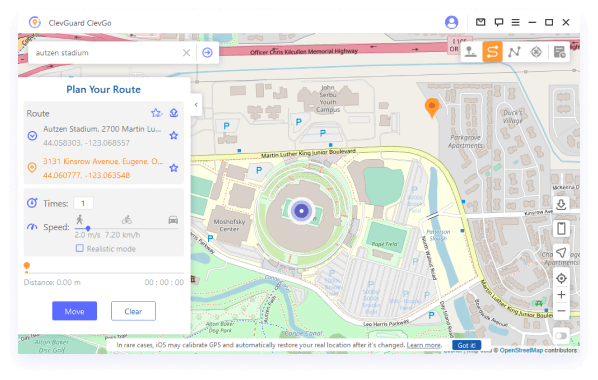
When all the things are set, click "Move" to start simulating GPS movement. As your location moves on the dashboard, so is the location on your device.
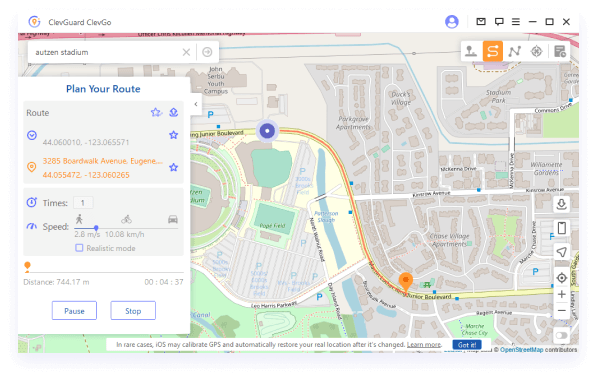
When reaching the final location, a "Completed!" notification will pop out to let you know.
Part 4: Simulate GPS Movement - Multi-spot Mode
1. Select "Multi-spot Mode"
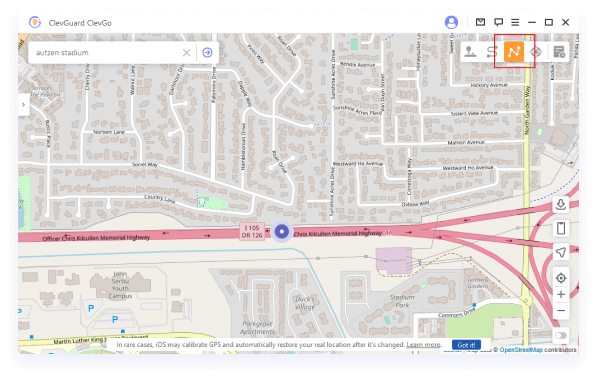
Select "Multi-spot Mode" in the upper right corner of the dashboard which is the third option.
2. Select Multiple Spots
Multi-spot means you can choose many different spots (up to 100) on the map to pass by when simulating the movement. You can find the locations by entering the address or coordinates on the search box or simply pining the locations on the map. In this part, you may need to choose the locations along specific roads to make it more real.
Now you can set up the numbers of moving times and the speed by dragging the speed bar. Once everything is set, click "Move" to start.
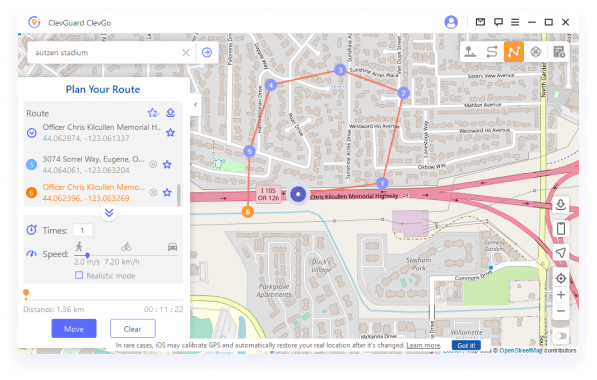
You are free to pause/continue/stop during the movement. When reaching the final location, a "Completed!" notification will pop out to let you know.
Part 5: Spoof GPS Location with Flexibility - Joystick Mode
1. Select "Joystick Mode"
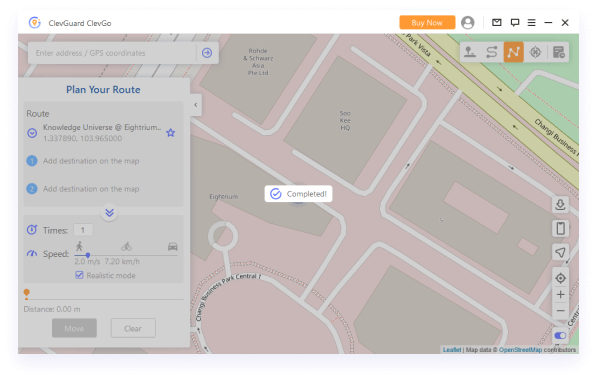
Select "Joystick Mode" in the upper right corner of the dashboard which is the first option. Click "Move" to change location automatically.
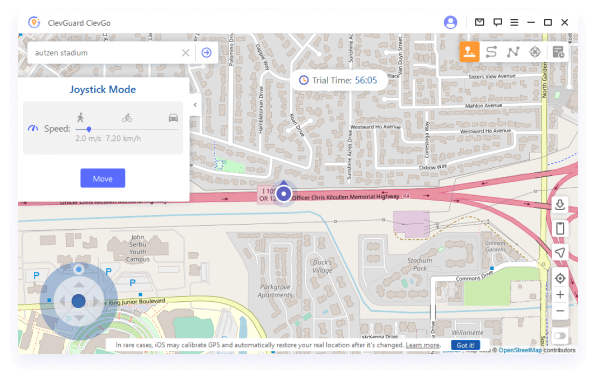
You can change location in 360-degree, and move forward or backward by clicking the direction button.
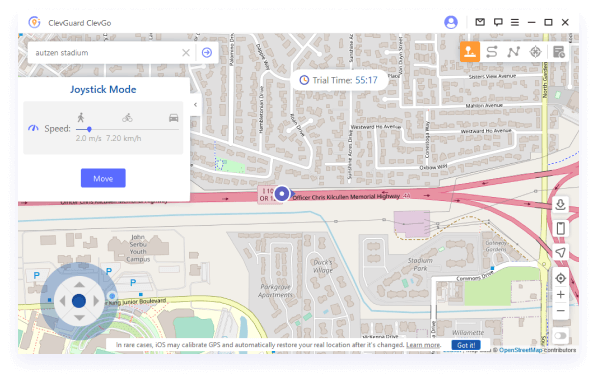
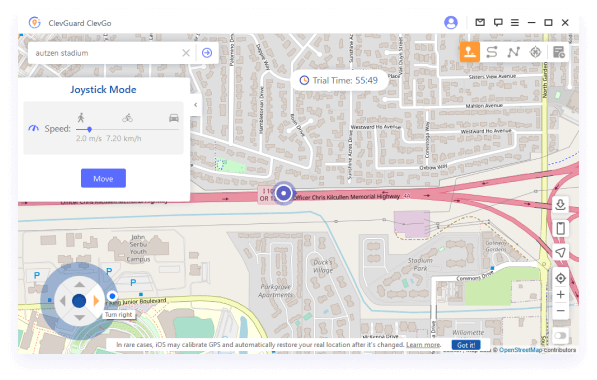
To change moving directions in real-time:
Click the arrow keys on the keyboard;
Click W/S/A/D keys to go up/down/left/right.
Part 6: More Exclusive Features of ClevGo
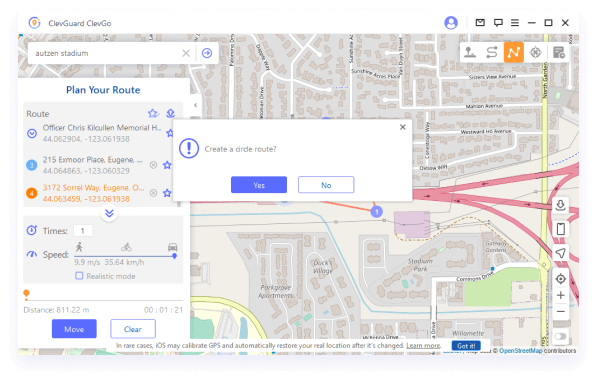
1. Circle Route
During Multi-spot Mode, if the initial and final location is close to each other, a notification would pop out automatically to ask you if you want to create a circle route. Click "Yes" to connect both spots. Click "No" and everything stays the same.
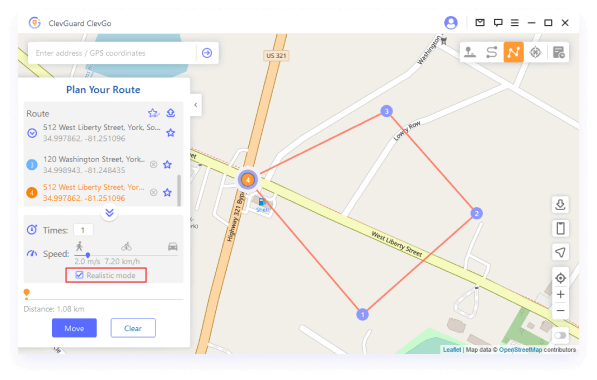
2. Realistic Mode
"Realistic Mode" applies to "Two-spot Mode" and "Multi-spot Mode". the moving speed will randomly fluctuate between the upper and lower 30% of the selected speed range. The speed varies every 5 seconds.
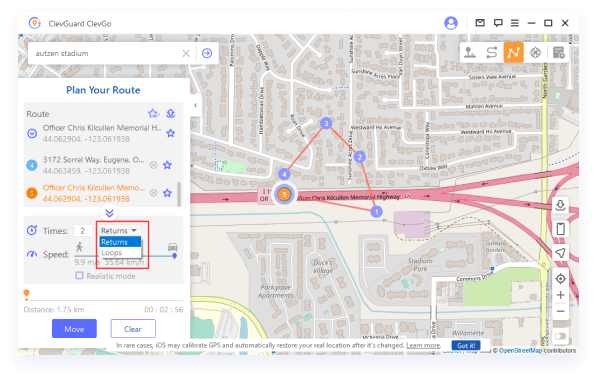
3. Returns or Loops
When using the "Two-spot Mode" and "Multi-spot Mode" to simulate movement, If the number of moving times is above 1, the user can choose whether to have the device move back and forth along the route or to move in loop along the route, as needed.
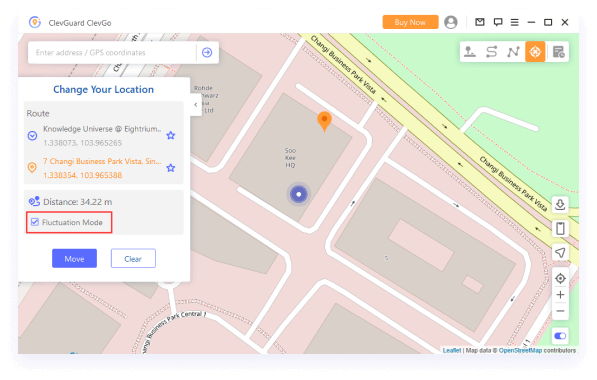
4. Fluctuation Mode
The virtual location will fluctuate back and forth within 5m of the location, which can reduce warnings from other apps about location changes.
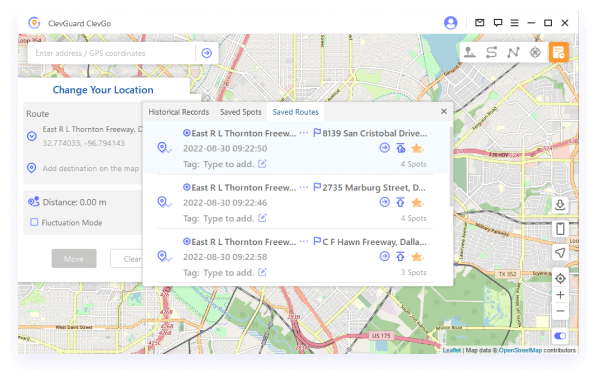
5. History Records
All the addresses and routes you used will be saved in the History Records. You could click on the Star icon to collect the chosen spots.
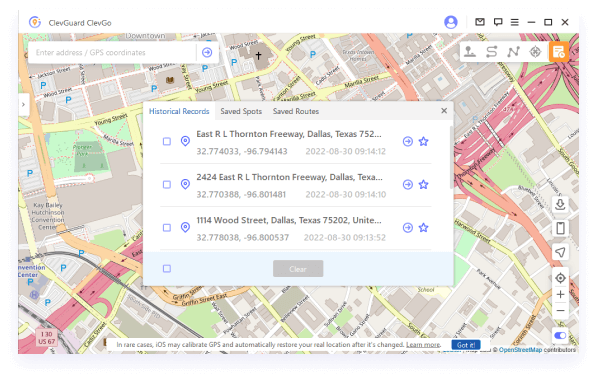
The saved spots or routes will be displayed on your favorite list for further use. Click the Top icon on the left to place your favorites at the top.
6. Import/Export GPX file
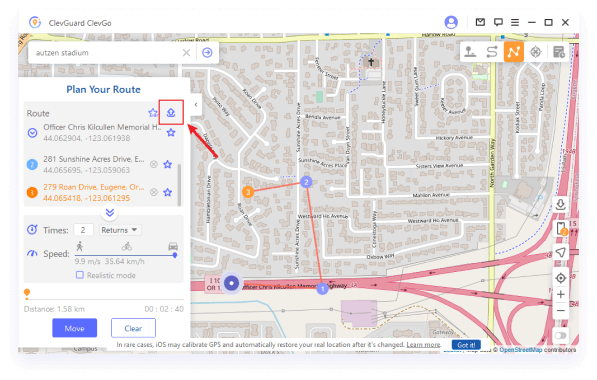
ClevGo can import/export GPX files of single and multiple paths to save your favorite routes now. Click the "Up" icon on the left route panel, and you can export the GPX file.
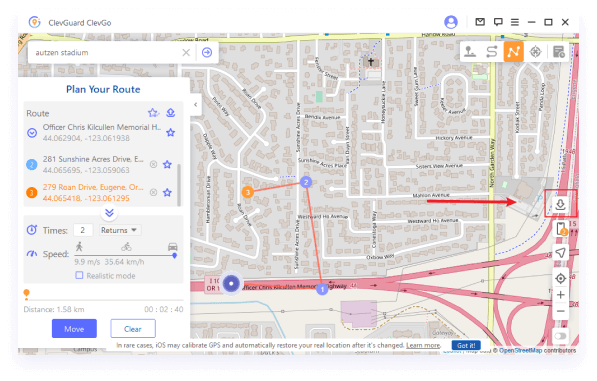
Click the "Down" icon on the right of the dashboard, and you can import the GPX file.
7. Cooldown Timer
When you use the "Teleport Mode" or "Jump Teleport Mode" to change your location, you will find the the cooling button in the right corner of the product interface.

Click on this button, the cooldown timer will appear then. When you choose the desired location and initiate the movement, the timer will calculate the appropriate cooldown time based on the distance.
If you don't want to use coolling timer function, just click the button again to turn it off.

If you want to recalculate the time when you modifying your location, tap "Reset" to refresh it.

8. Support 5 Different Devices
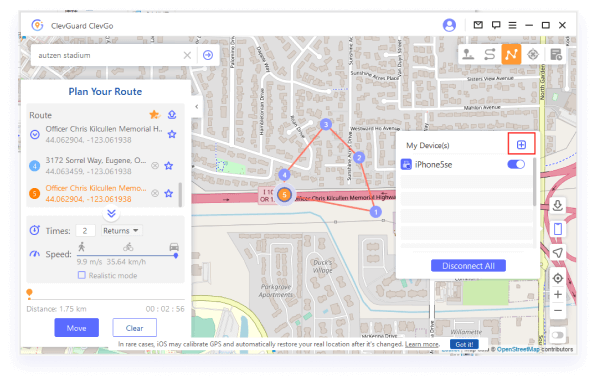
If you are to add more devices, click the Phone icon on the right side of the dashboard. Click "+" to add more devices. Then repeat the connecting process. You can choose to disconnect one of them or all of them.
How to Use ClevGo?
- Change Location on iOS More>>
- Change Location on Android with PC More > >
- Change Location on Android with Mobile More>>
Change Your Location on Android Mobile
Before You Start: Download ClevGo App on Your Android Mobile Device
Download the ClevGo app on your Android phone, allow its permissions and log into your account.
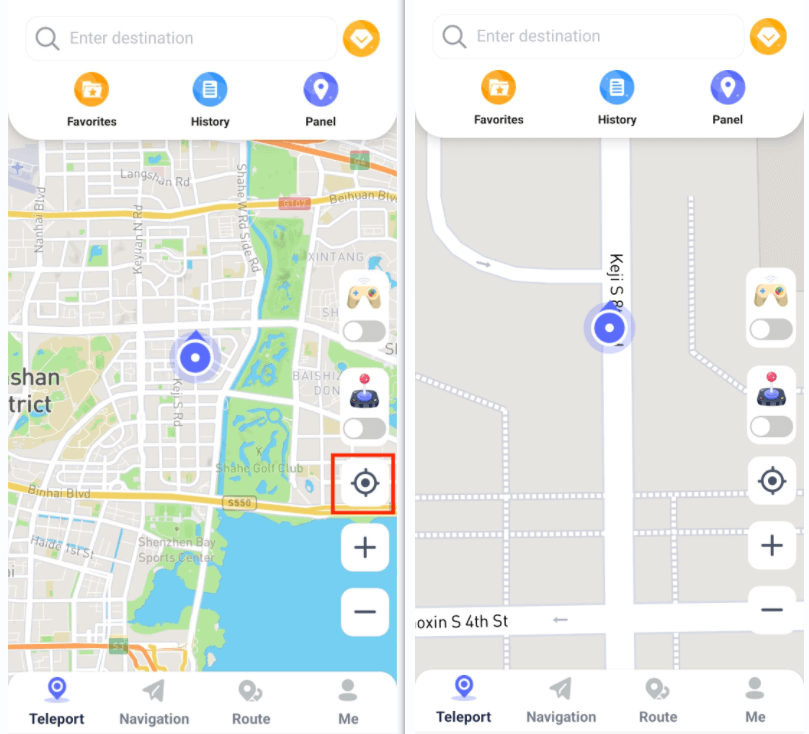
Function 1: Find My Location
Click Find My Location button, then the map will show your current location.
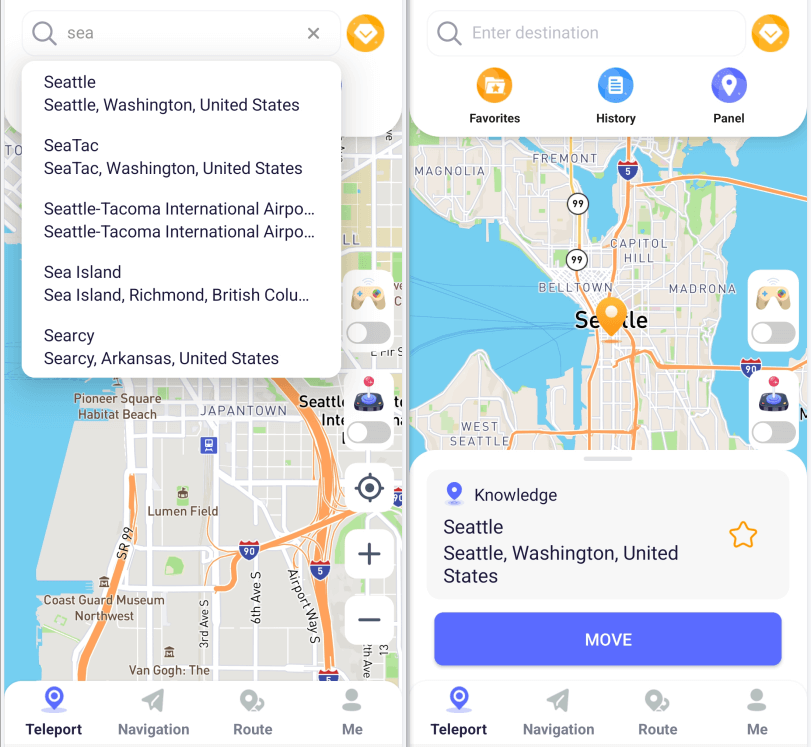
Function 2: Teleport Mode
You can select the target location by long-pressing the map, or search for your target location by entering the address, latitude, and longitude at the top of the page.
After selecting the target location, it will appear a pop-up window to show the specific address. Then click on Move, now you can move the location to wherever you want.
Function 3: Joystick Mode
If you want to mock your GPS location with joystick, you can select Joystick Mode.
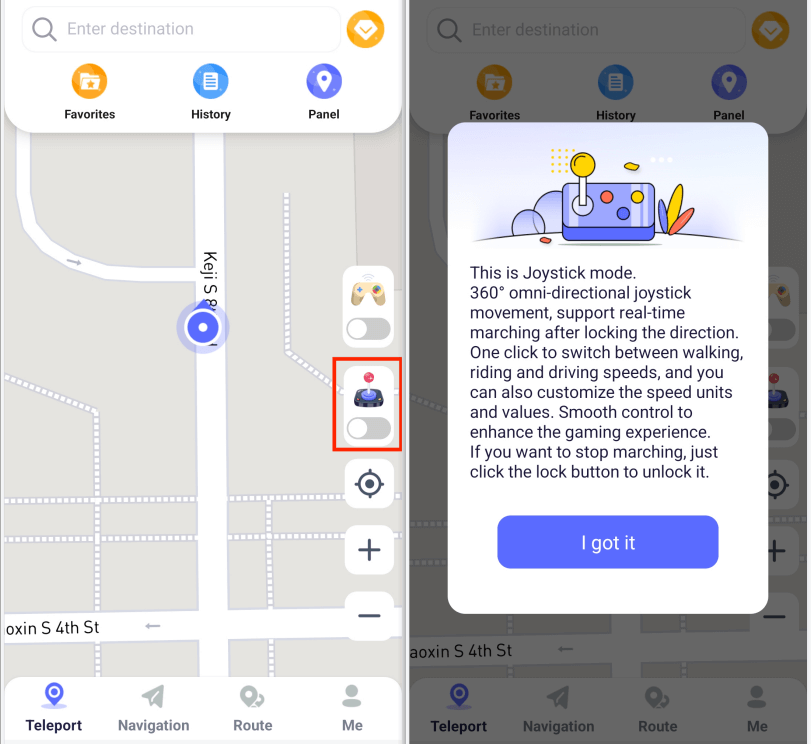
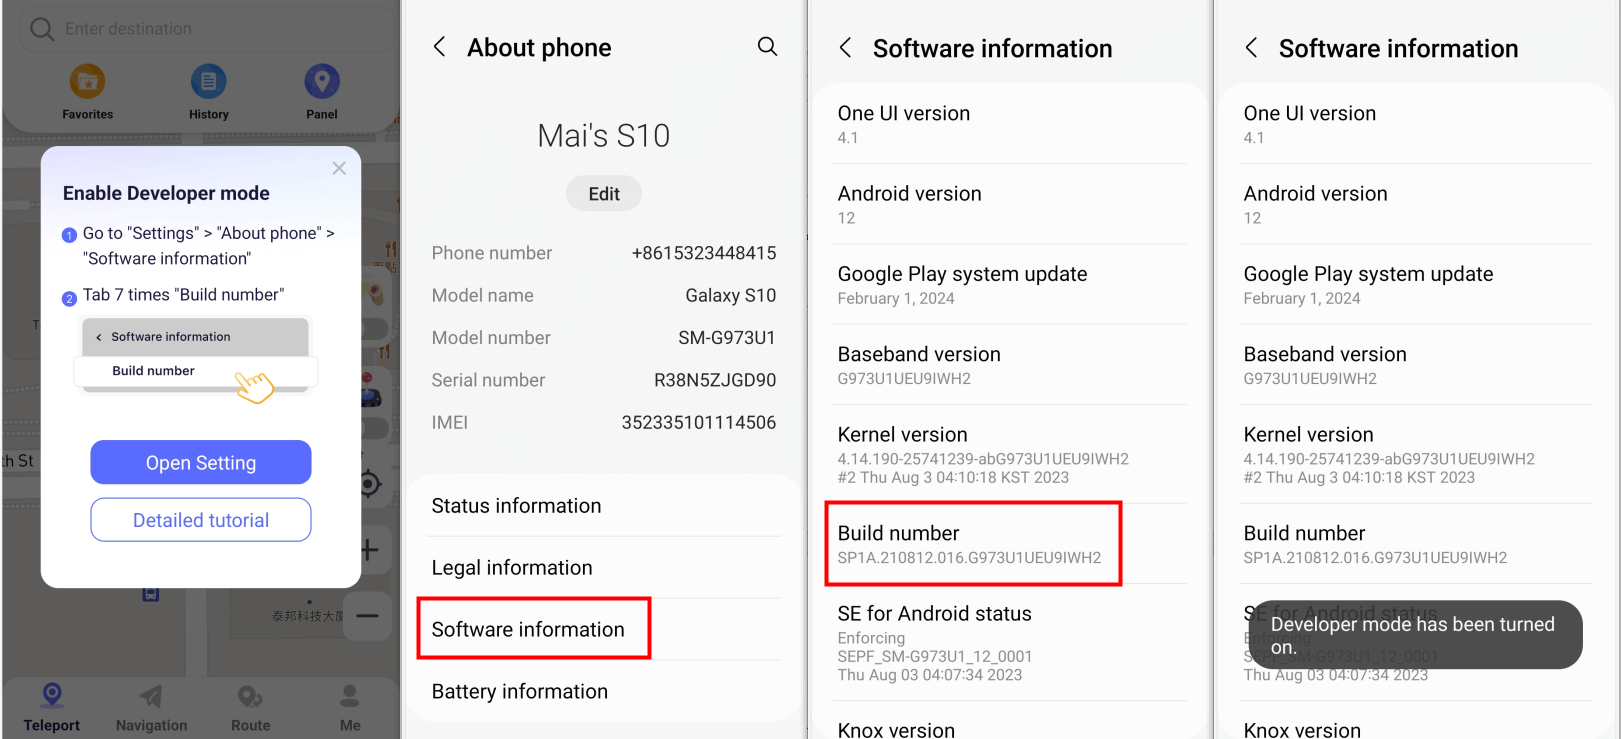
Step 1. Enable developer mode by following the operation below.
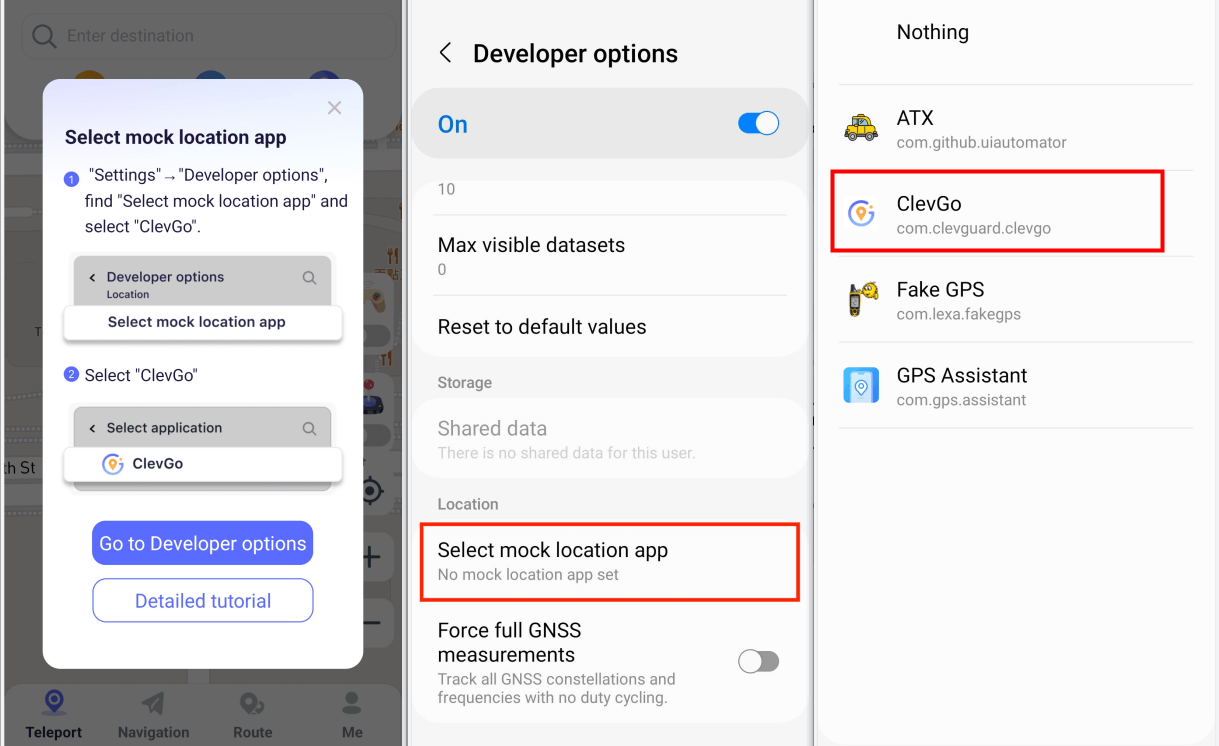
Step 2. Select ClevGo to be a mock location app.
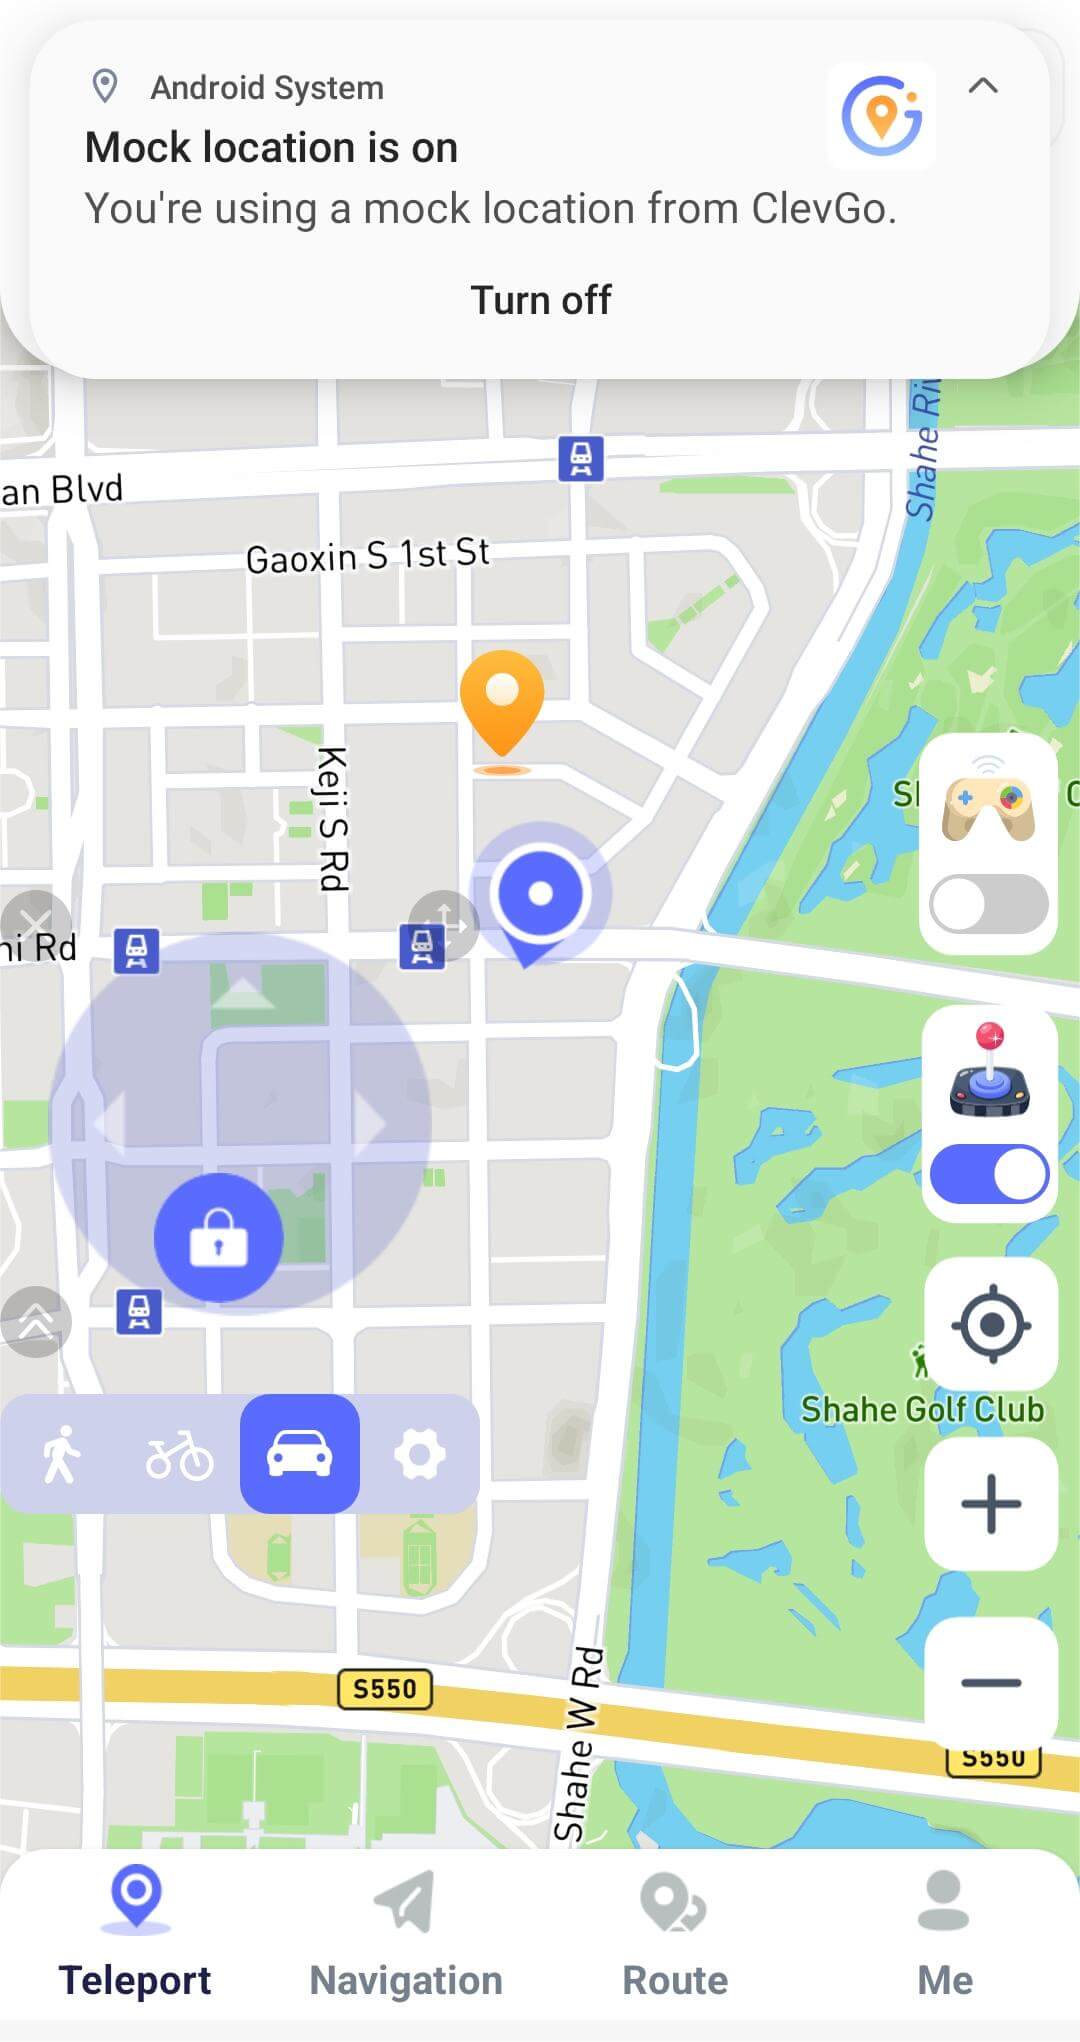
Step 3. Now you can set 360-degree directions. Move forward or reverse by controlling the Direction button.
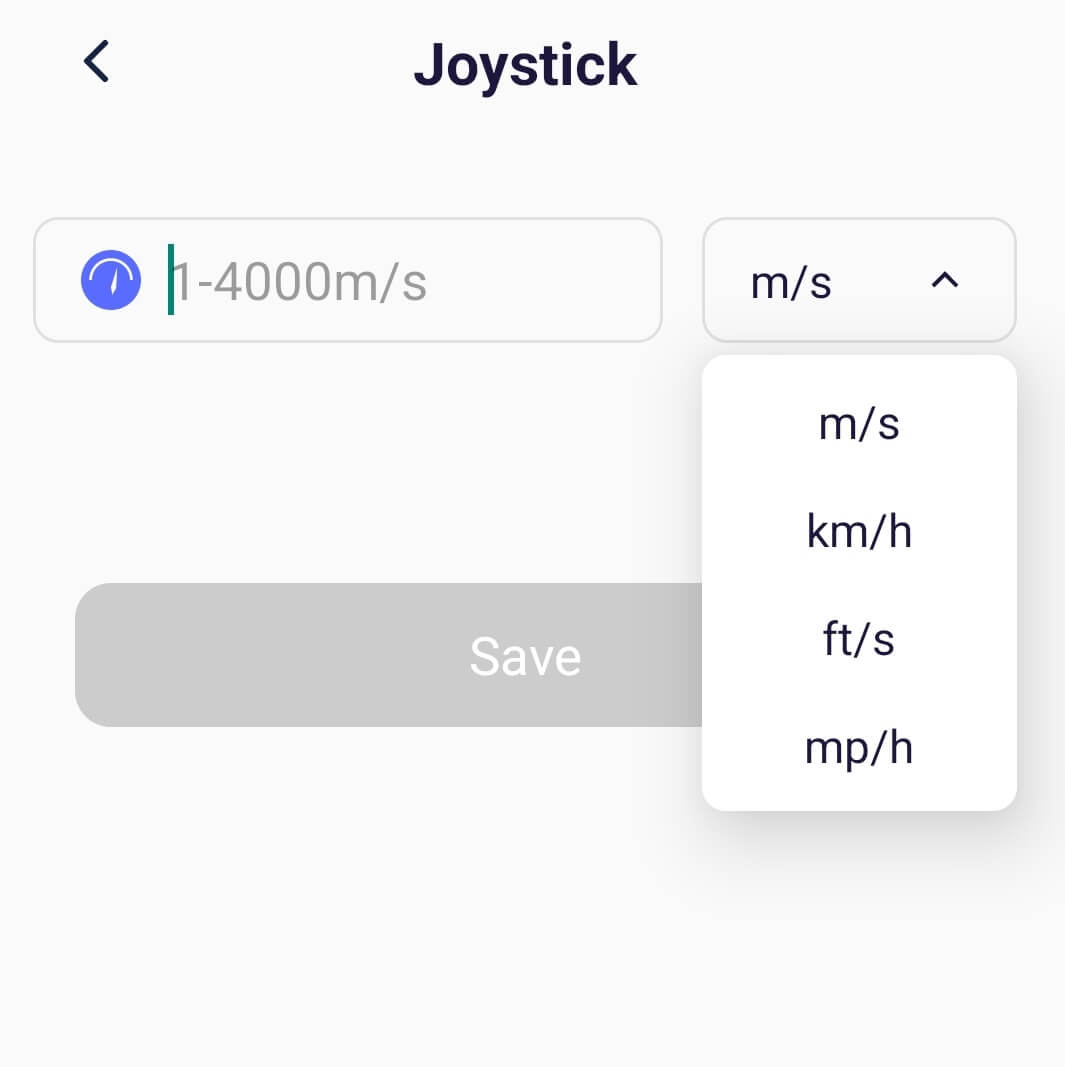
Also, you can set up the moving speed and change the directions in real-time marching.
Function 4: Specific Game Mode
Use the specific game mode to move the location according to the game. Here you can search for the specific location information of Pokémon, raids and missions in real time, and go to the coordinates to catch Pokémon.
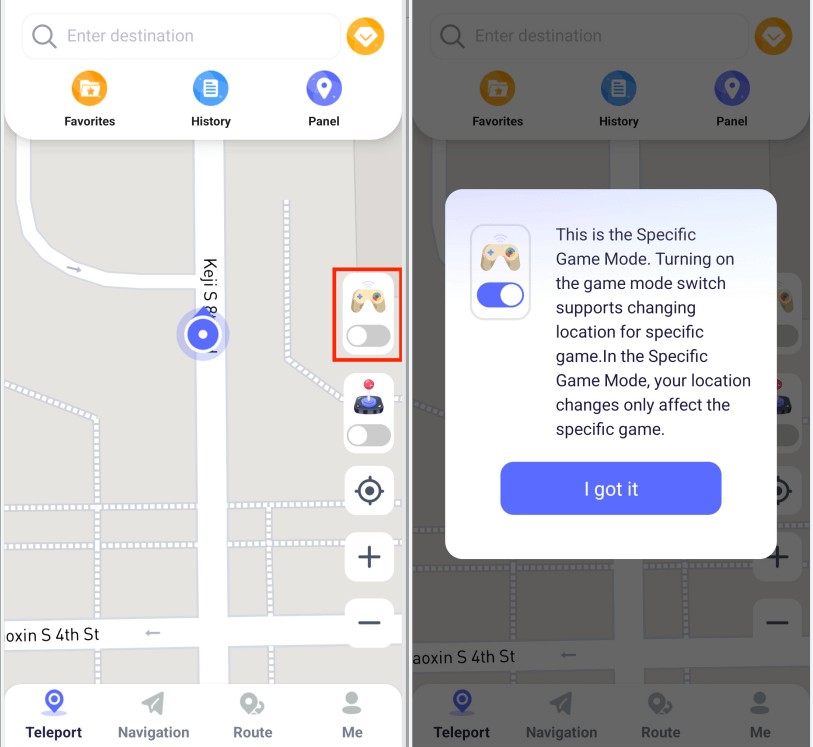
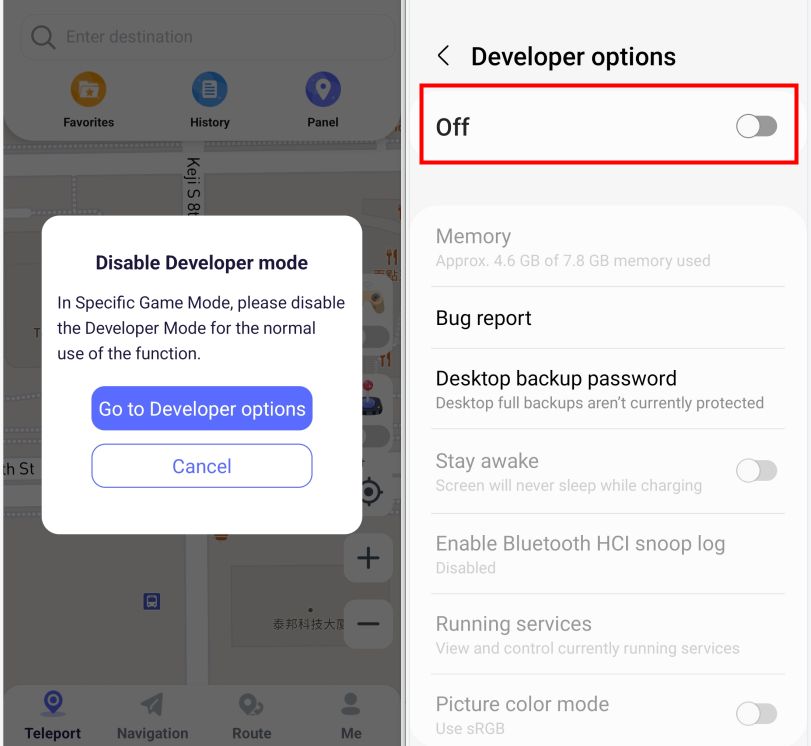
Step 1. Before you get started, you should disable the developer options.
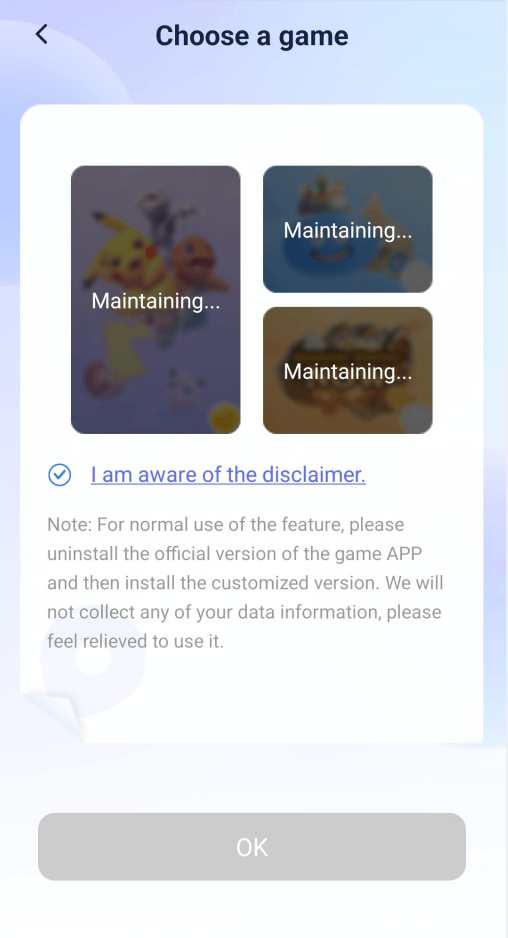
Step 2. Then choose a game to apply the specific game mode.
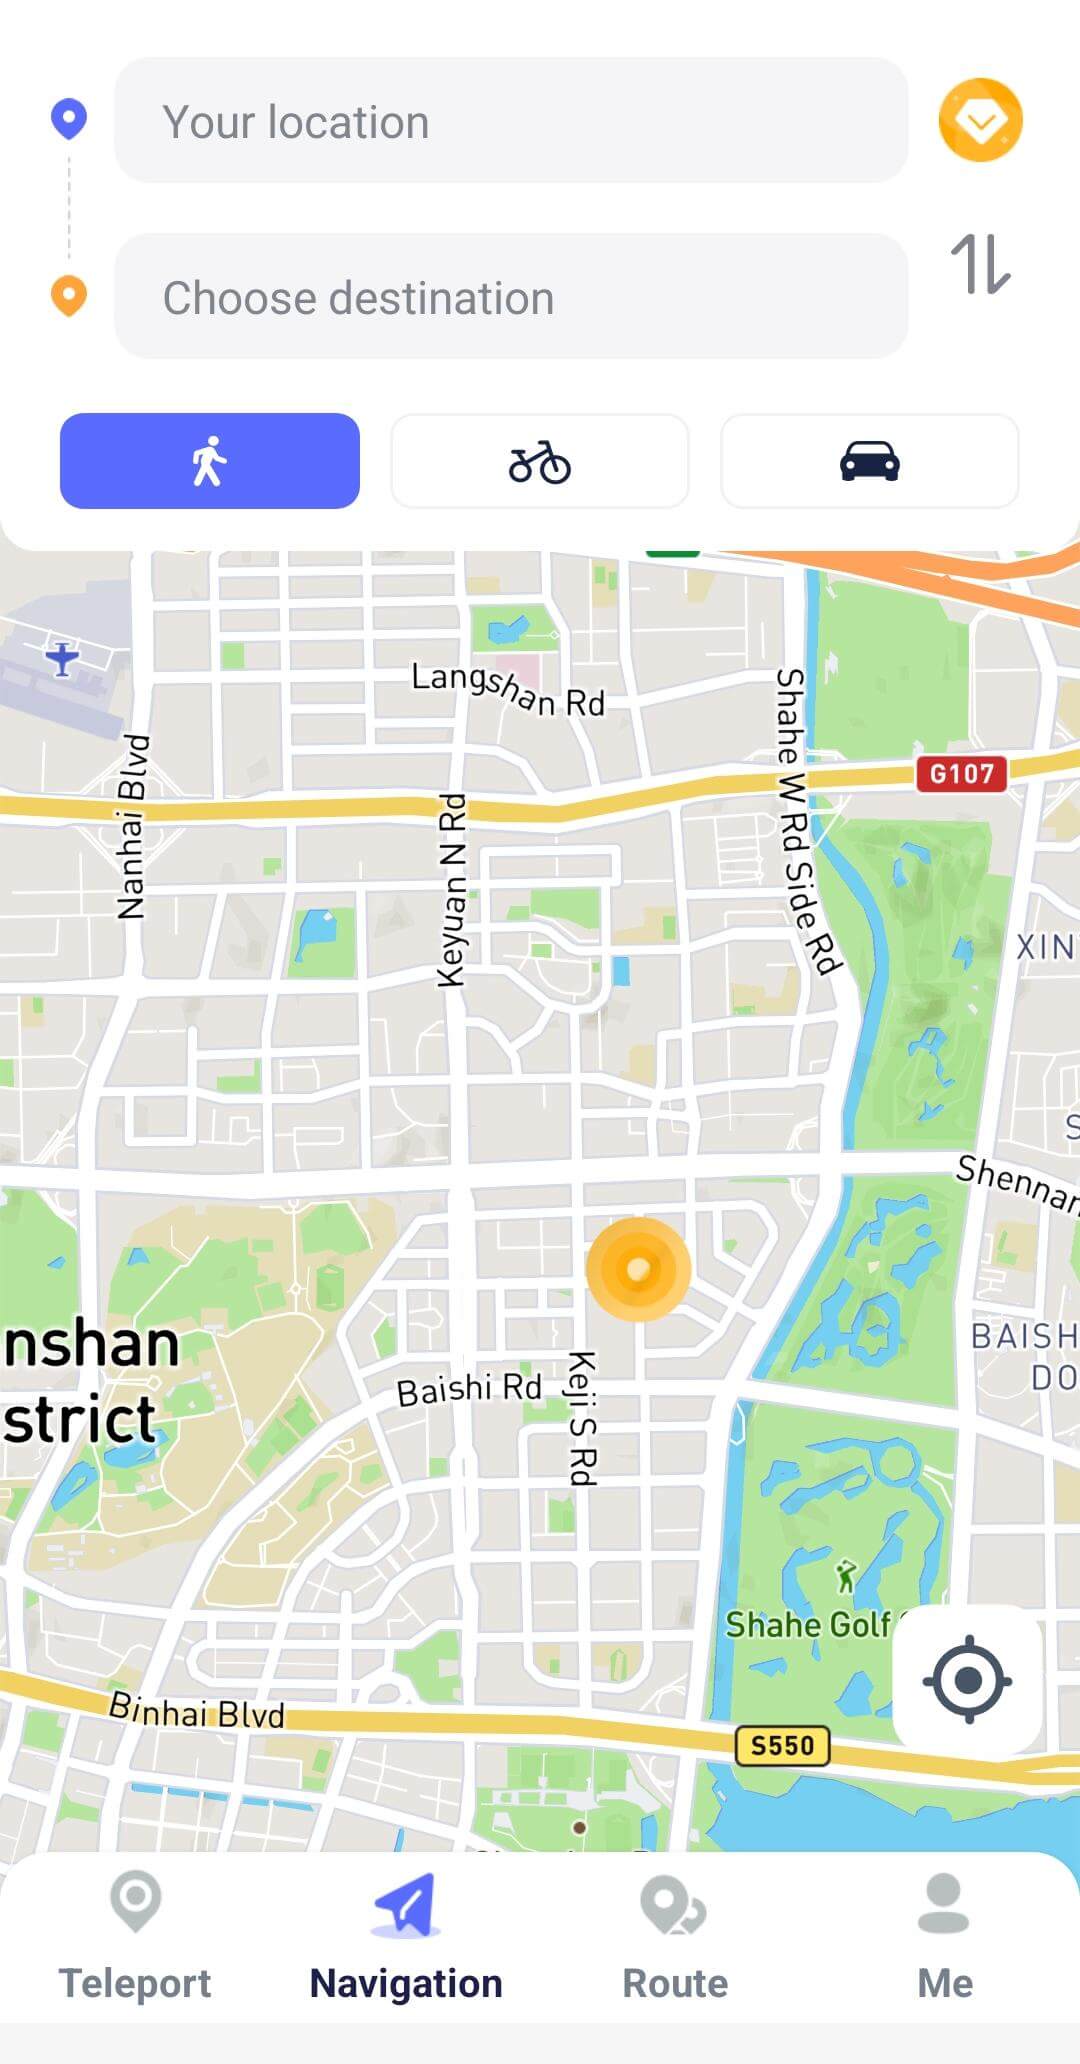
Function 5: Navigation Mode
Enter the your destination to navigate your location. You can choose the speed like walking, cycling, and driving.
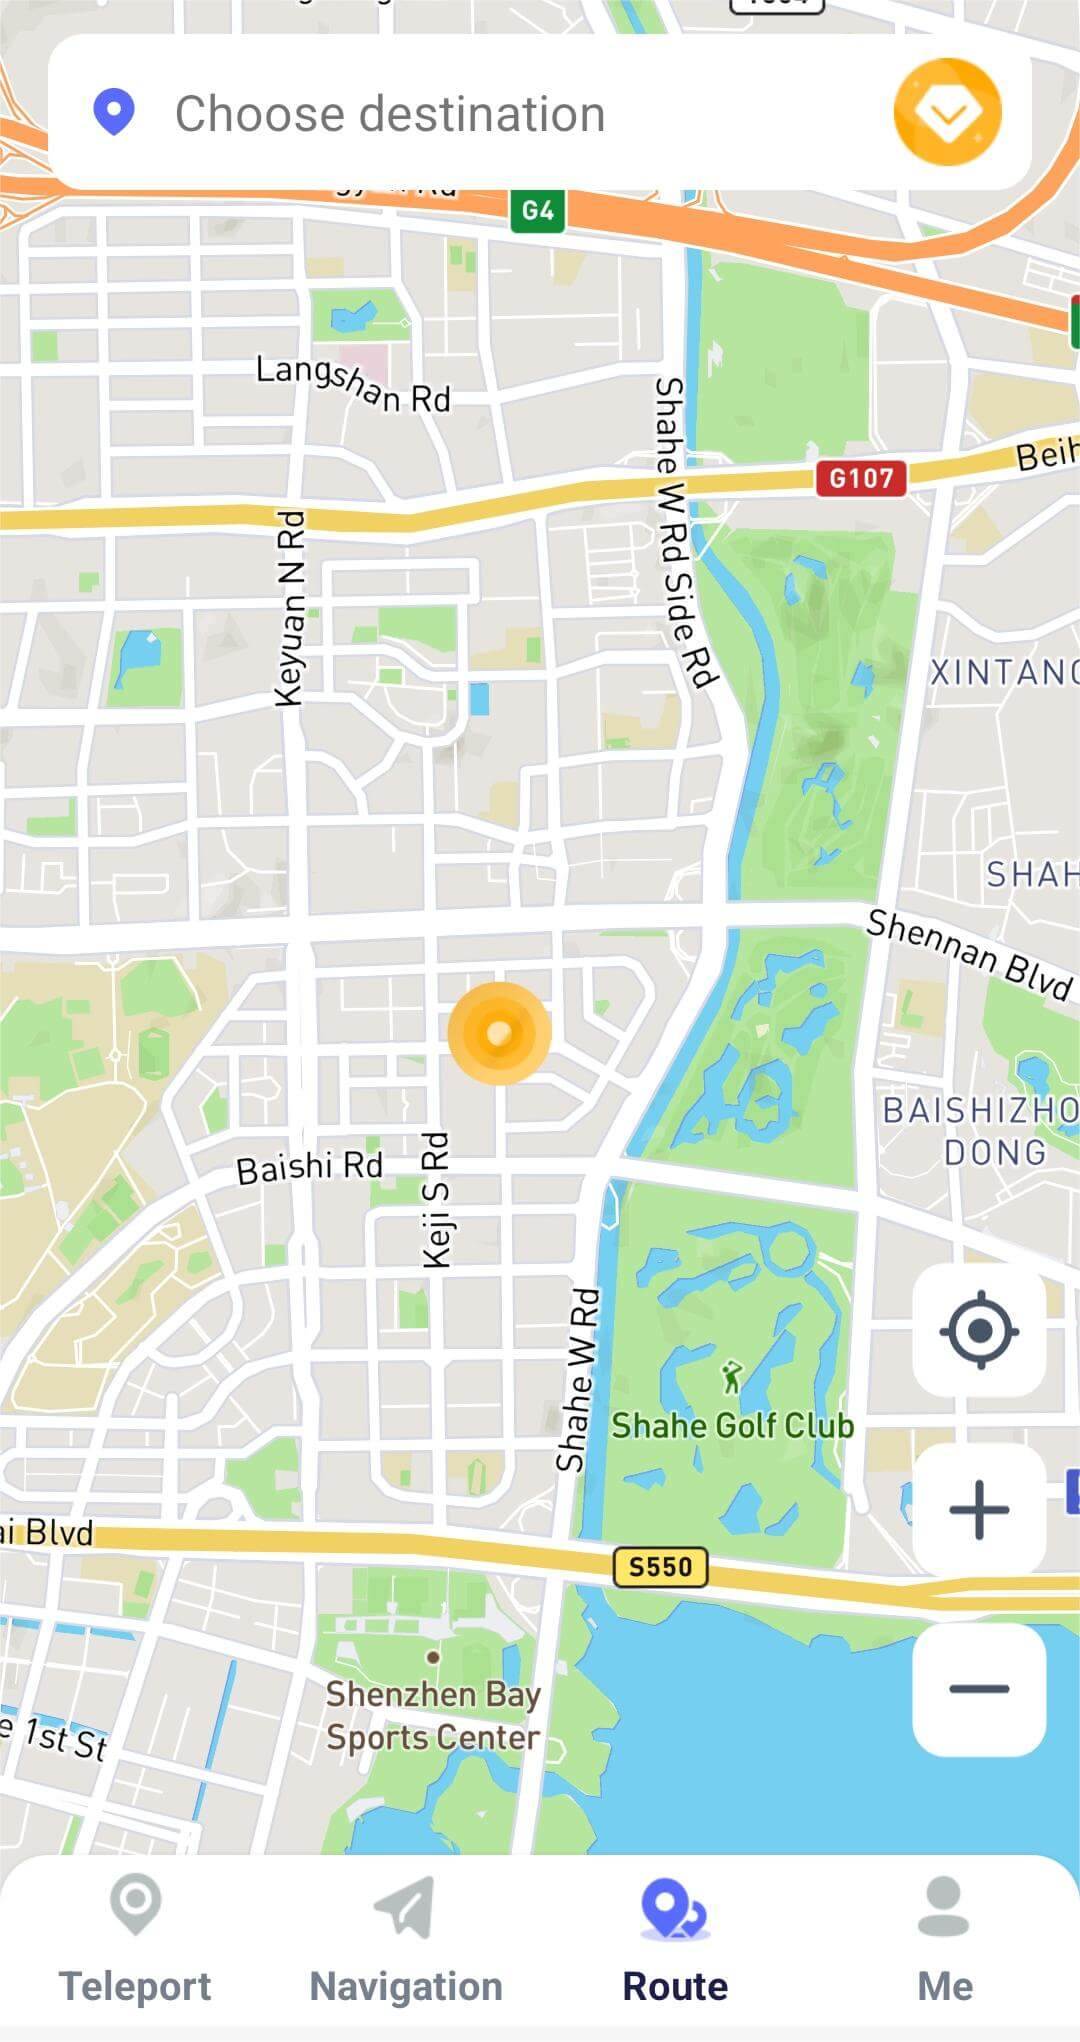
Function 6: Route Mode
You can use the route mode to change your location. Choose your destination right now!

Yes
No
Thanks for your kind feedback!
You have already submitted!
OK


 5 Steps